Create a synthesis
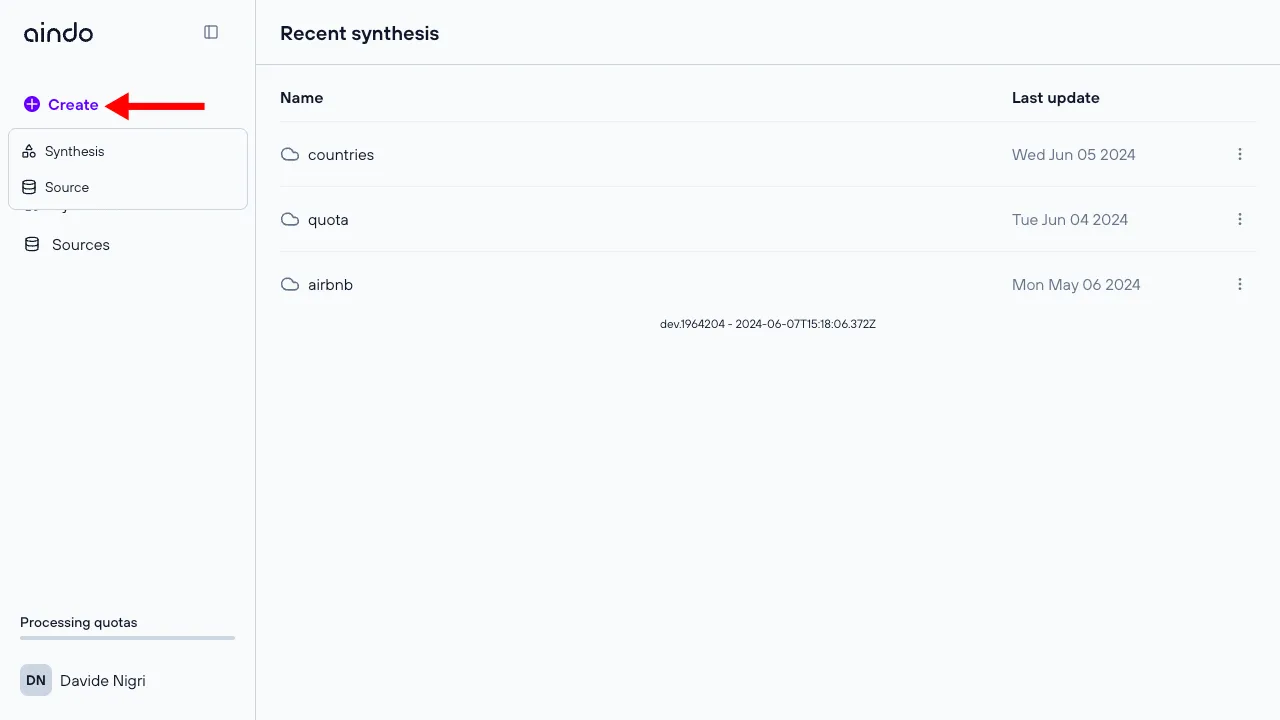
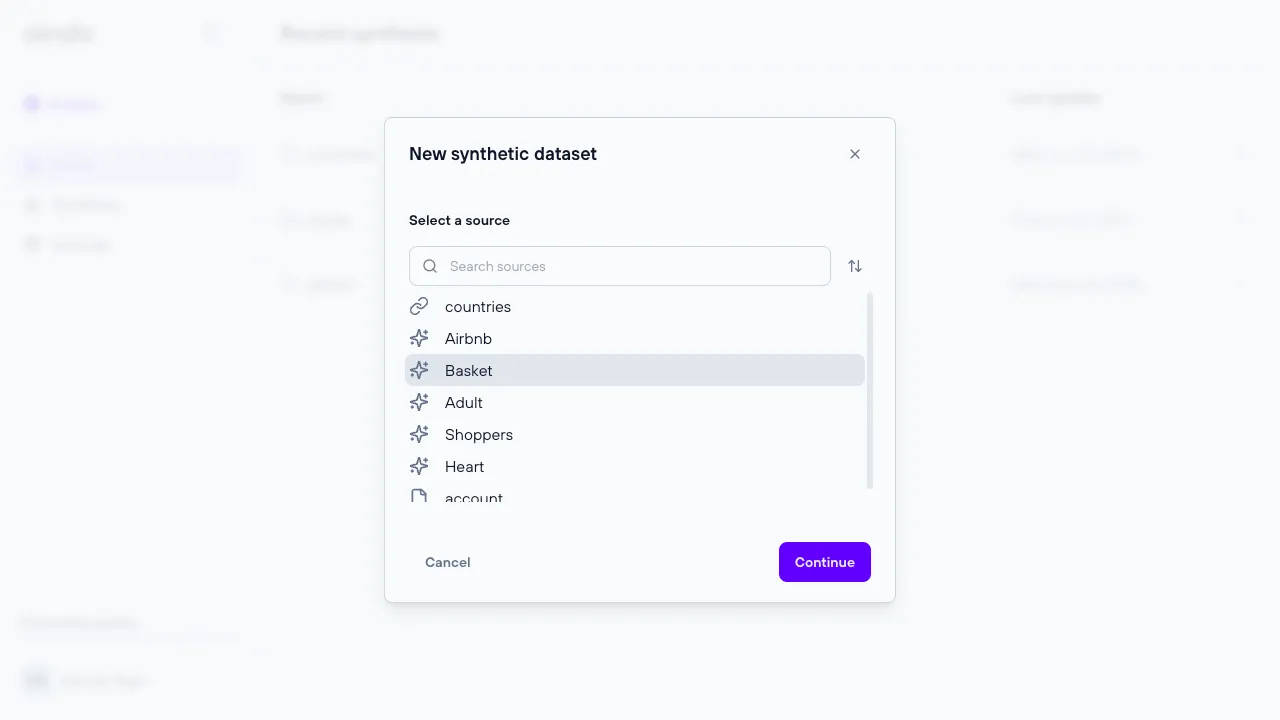
To generate synthetic data, you need to run a synthesis on a specific source. This process can be initiated from the synthesis dialog.
Configuration steps
Before creating the synthesis, the source configurator allows you to review and modify some properties of the tabular data that will be used.
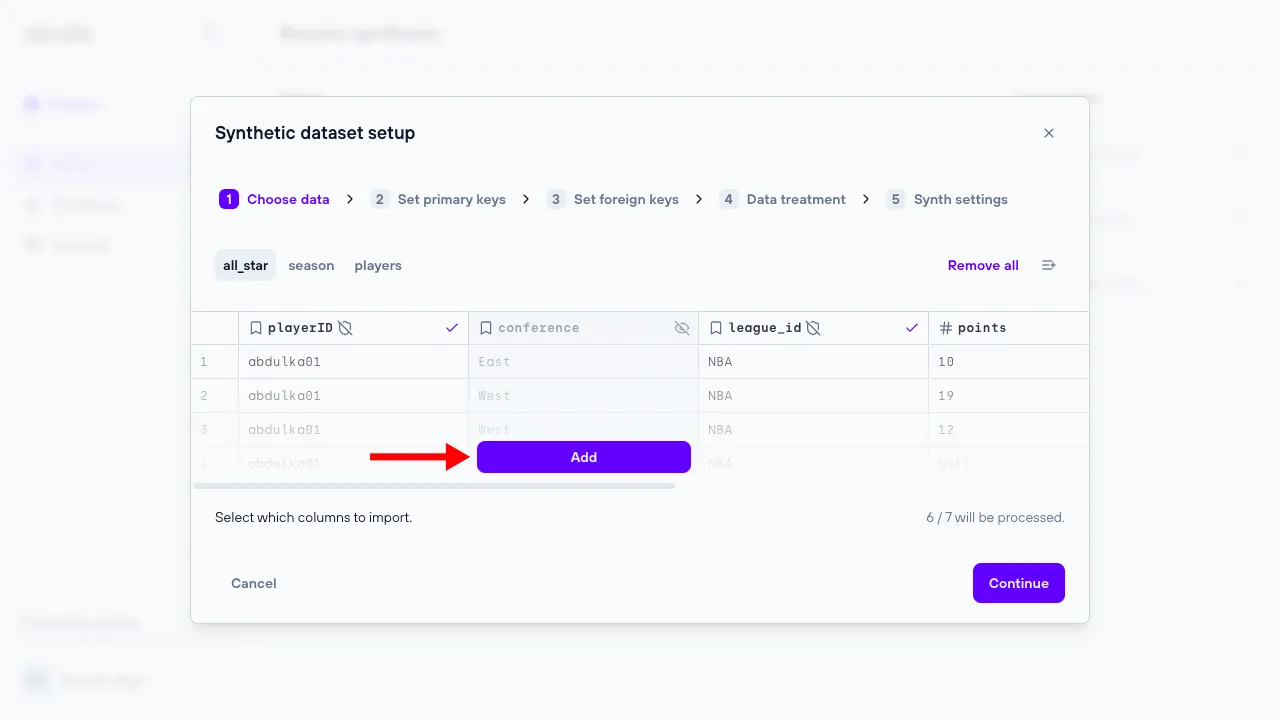
1. Choose data
The ‘Choose data’ step allows the user to include or exclude certain tables and/or columns from the data previously uploaded.

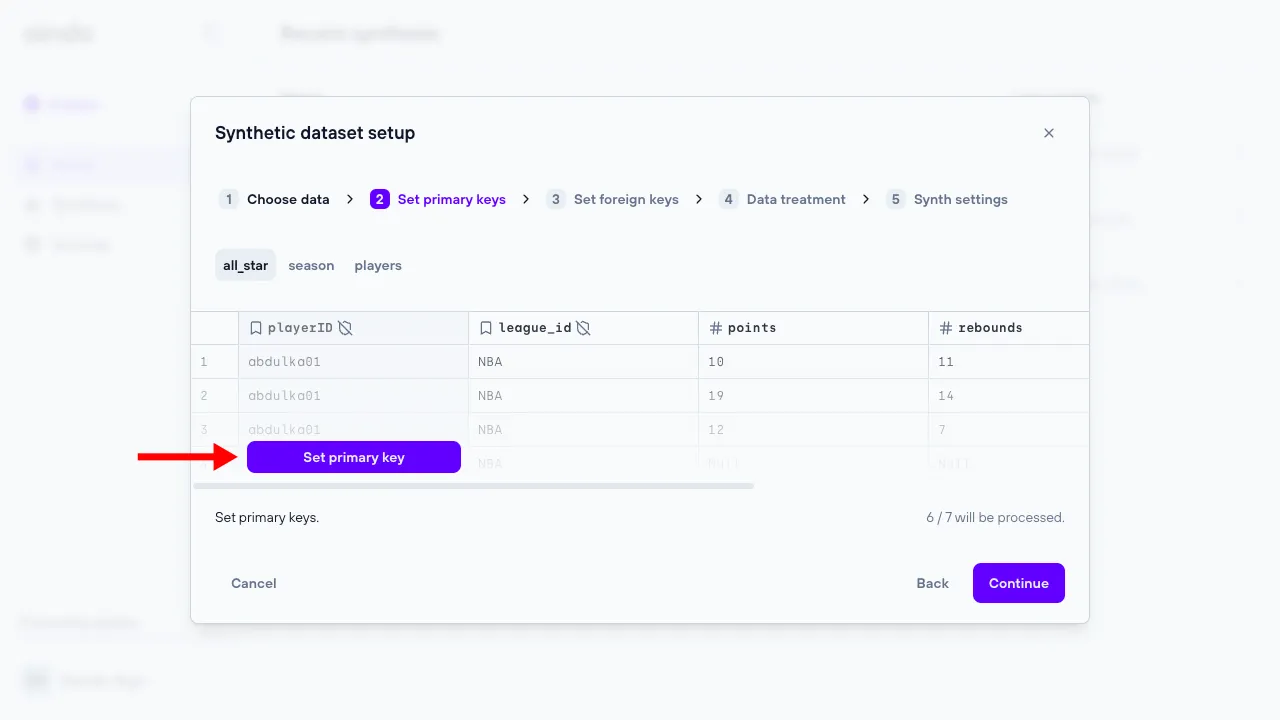
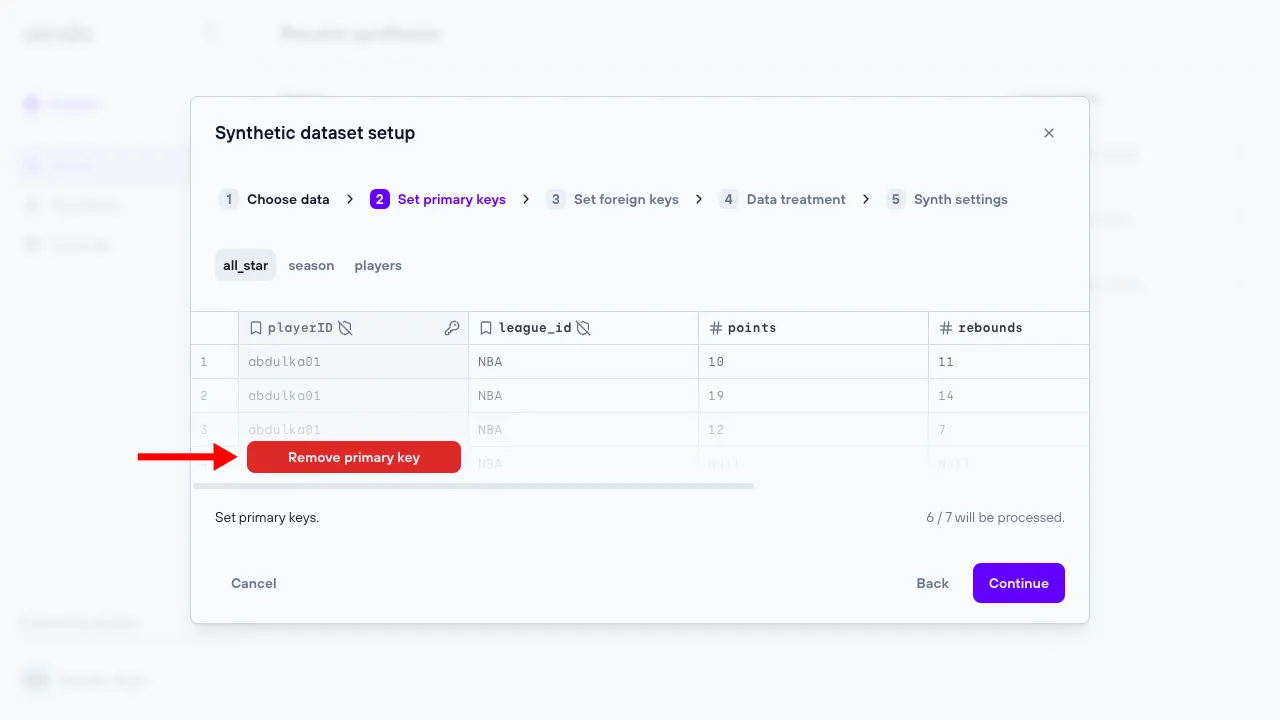
2. Set primary keys
The ‘Set primary keys’ step allows the user set and unset primary keys for every table of the data previously uploaded.
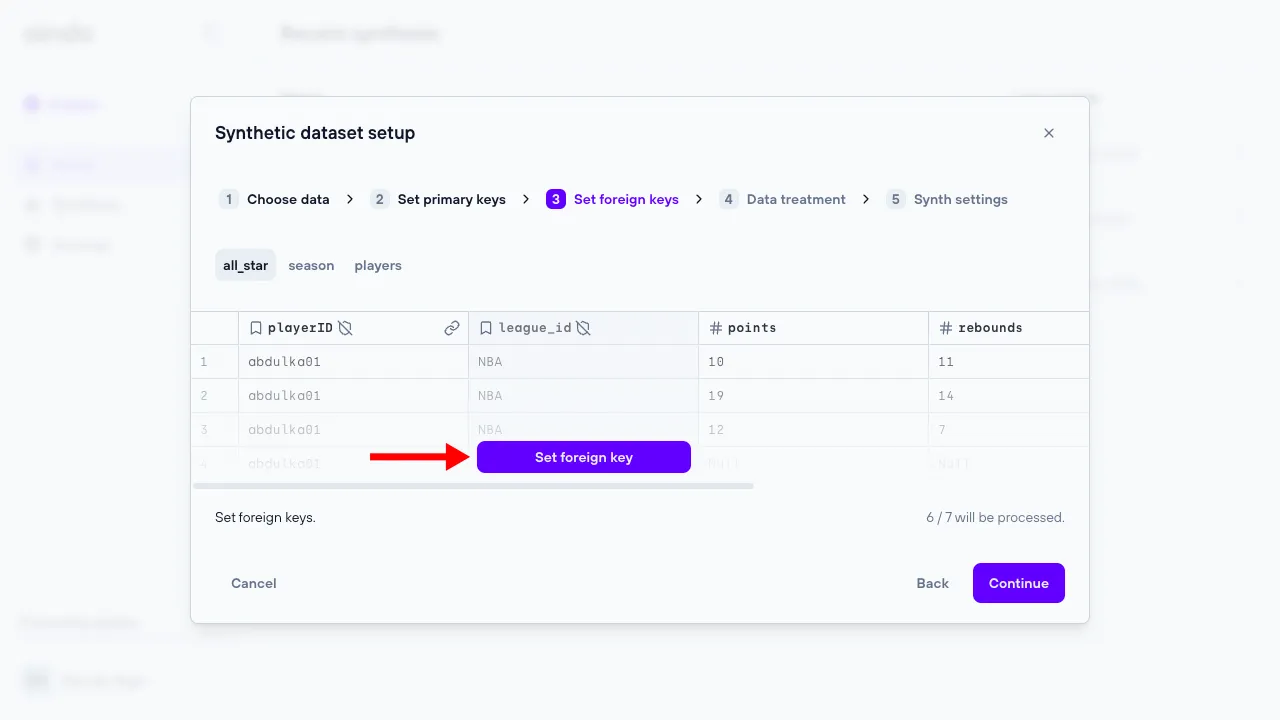
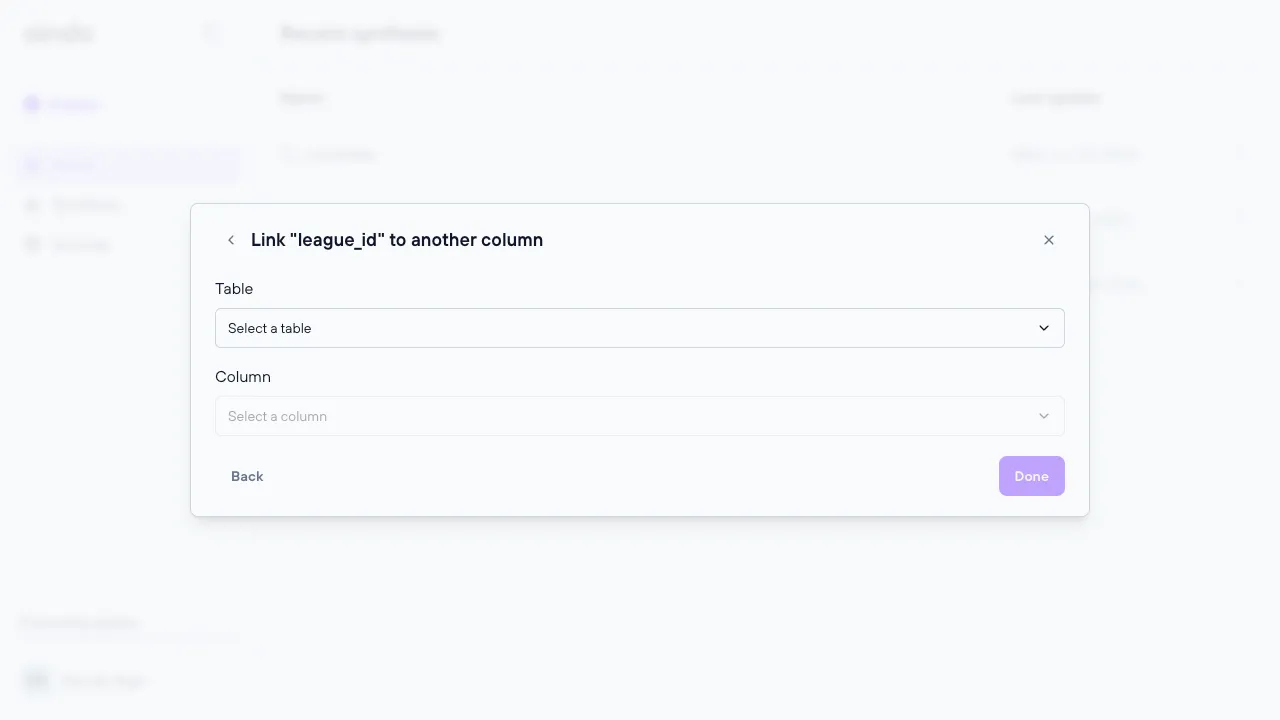
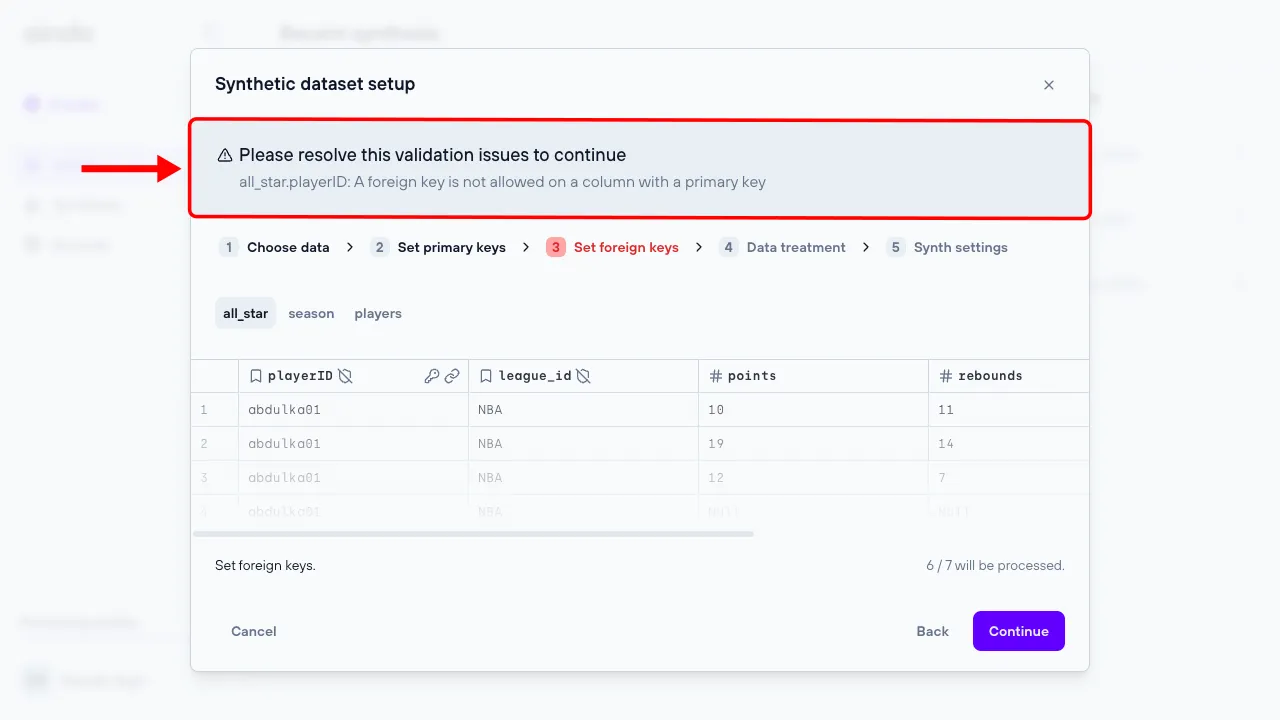
3. Set foreign keys
The ‘Set foreign keys’ step allows the user to set and unset foreign keys for every table of the data previously uploaded.
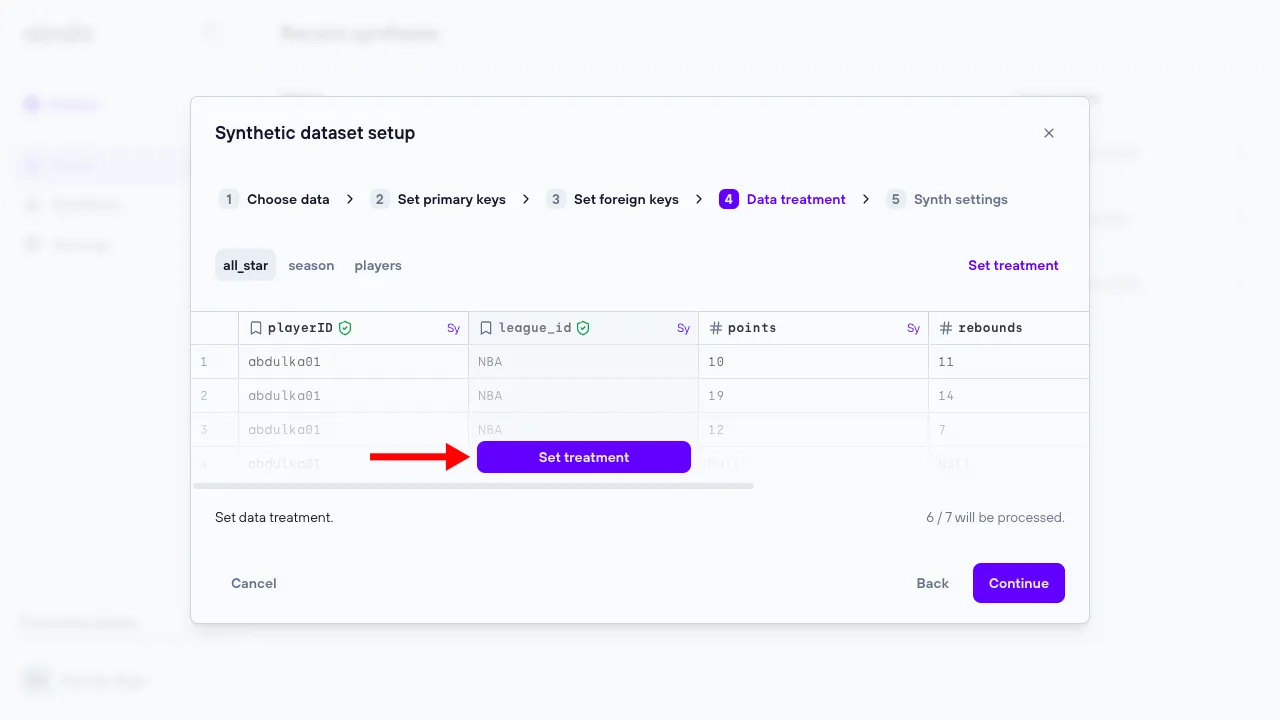
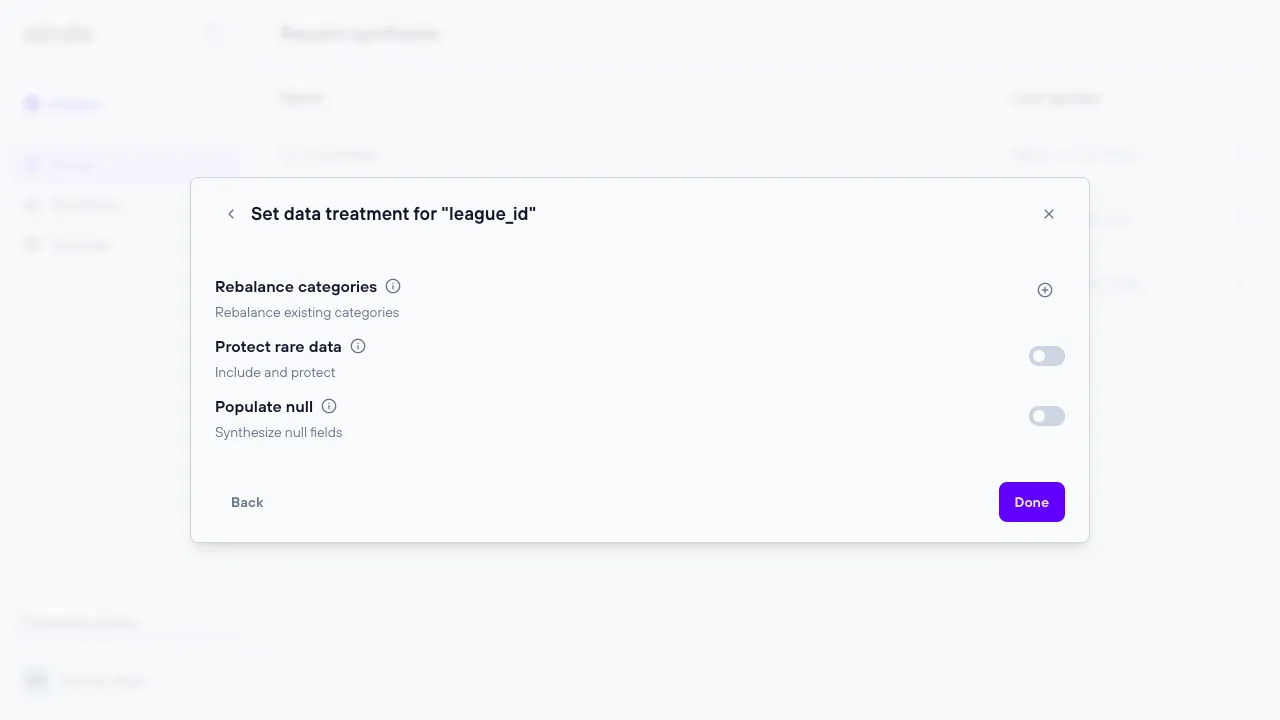
4. Data treatment
The ‘Data Treatment’ step allows the user to configure various synthesis options at both the table and column levels. Columns marked with a green shield indicate sensitive data that will be synthesized, while columns marked with a gray shield indicate sensitive data that will not be synthesized. Some options are specific to the column type.
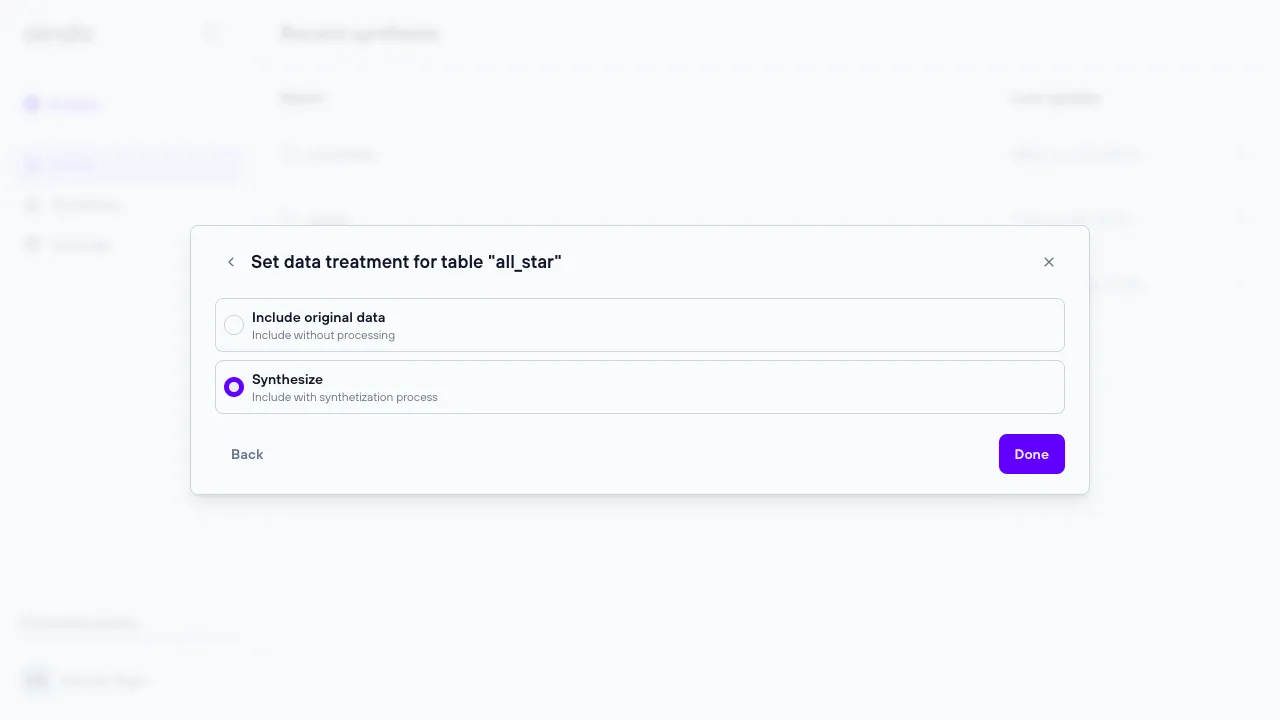
Marking table as “original data”
In this step, you can designate certain tables as “original data”. When a table is marked this way, it means the data in this table will be included in its original form without any transformation or synthesis. This is particularly useful for lookup tables, which often contain reference data like country codes, product categories, or status types that don’t need to be altered.
- Purpose: Lookup tables often contain fixed, non-sensitive data that should remain consistent across different datasets. By including the original data, you ensure that these reference values remain accurate and usable in synthesized datasets.
- Requirements: Tables set as “original data” must have at least one inbound foreign key relationship from another table. This ensures that the lookup table is properly referenced within the relational structure, which is crucial for maintaining referential integrity across the synthesized dataset.
- Exclusion from Root Table Validation: Tables marked as “original data” do not count towards the validation of the number of root tables. The validation ensures that there is only one root table in the relational structure. Lookup tables are considered auxiliary and are excluded from this count, as they only serve to support relationships between other tables.
- How It Works: When a table is marked as “original data,” it bypasses any synthetic processing. The data remains exactly as it was in the source, while other tables are synthesized. This is critical for preserving lookup or reference data that should not change, while still generating synthetic data for other parts of the schema.
- Visual Indicators: Tables marked as “original data” are indicated with a specific icon (e.g., an asterisk icon) to distinguish them from tables that will undergo synthesis.
For example, if you have a table containing product categories like “Electronics,” “Clothing,” or “Home Goods,” you may not want this information to be synthesized. By marking the table as Original Data, its values will be preserved exactly as they were in the original dataset. Additionally, since it is a lookup table with foreign key relationships, it remains part of the overall relational structure, but does not interfere with the root table validation.
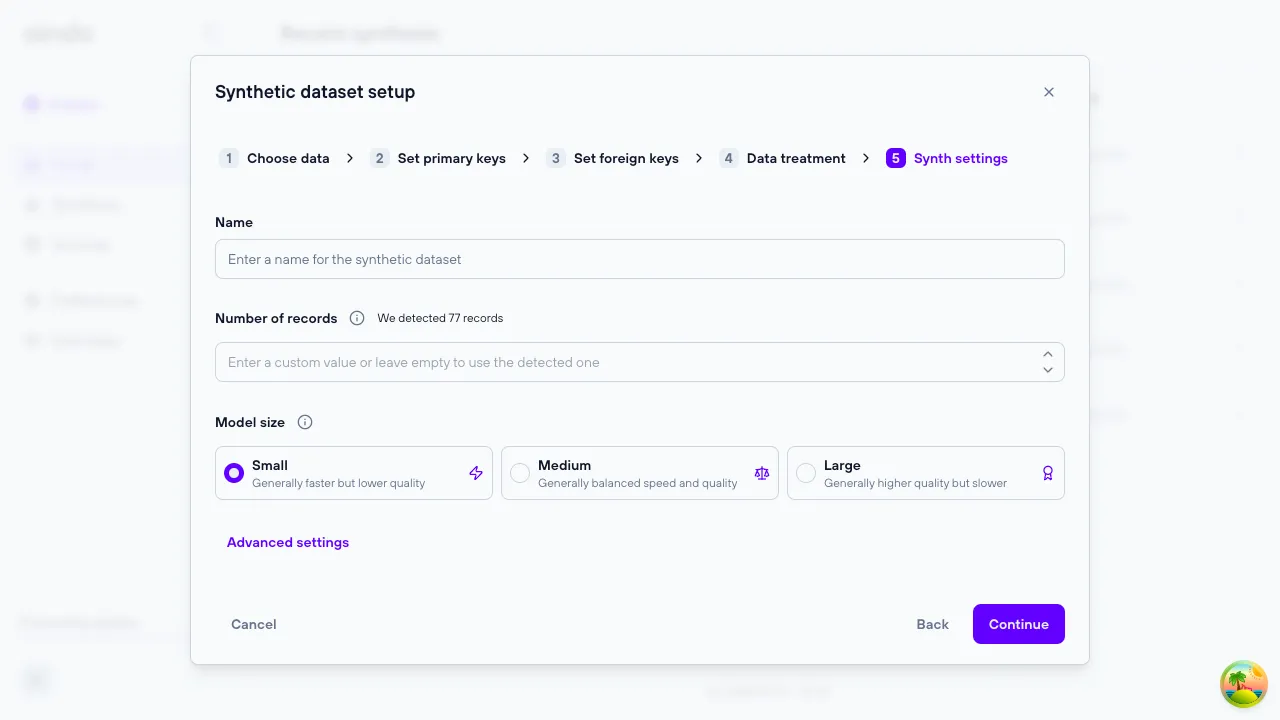
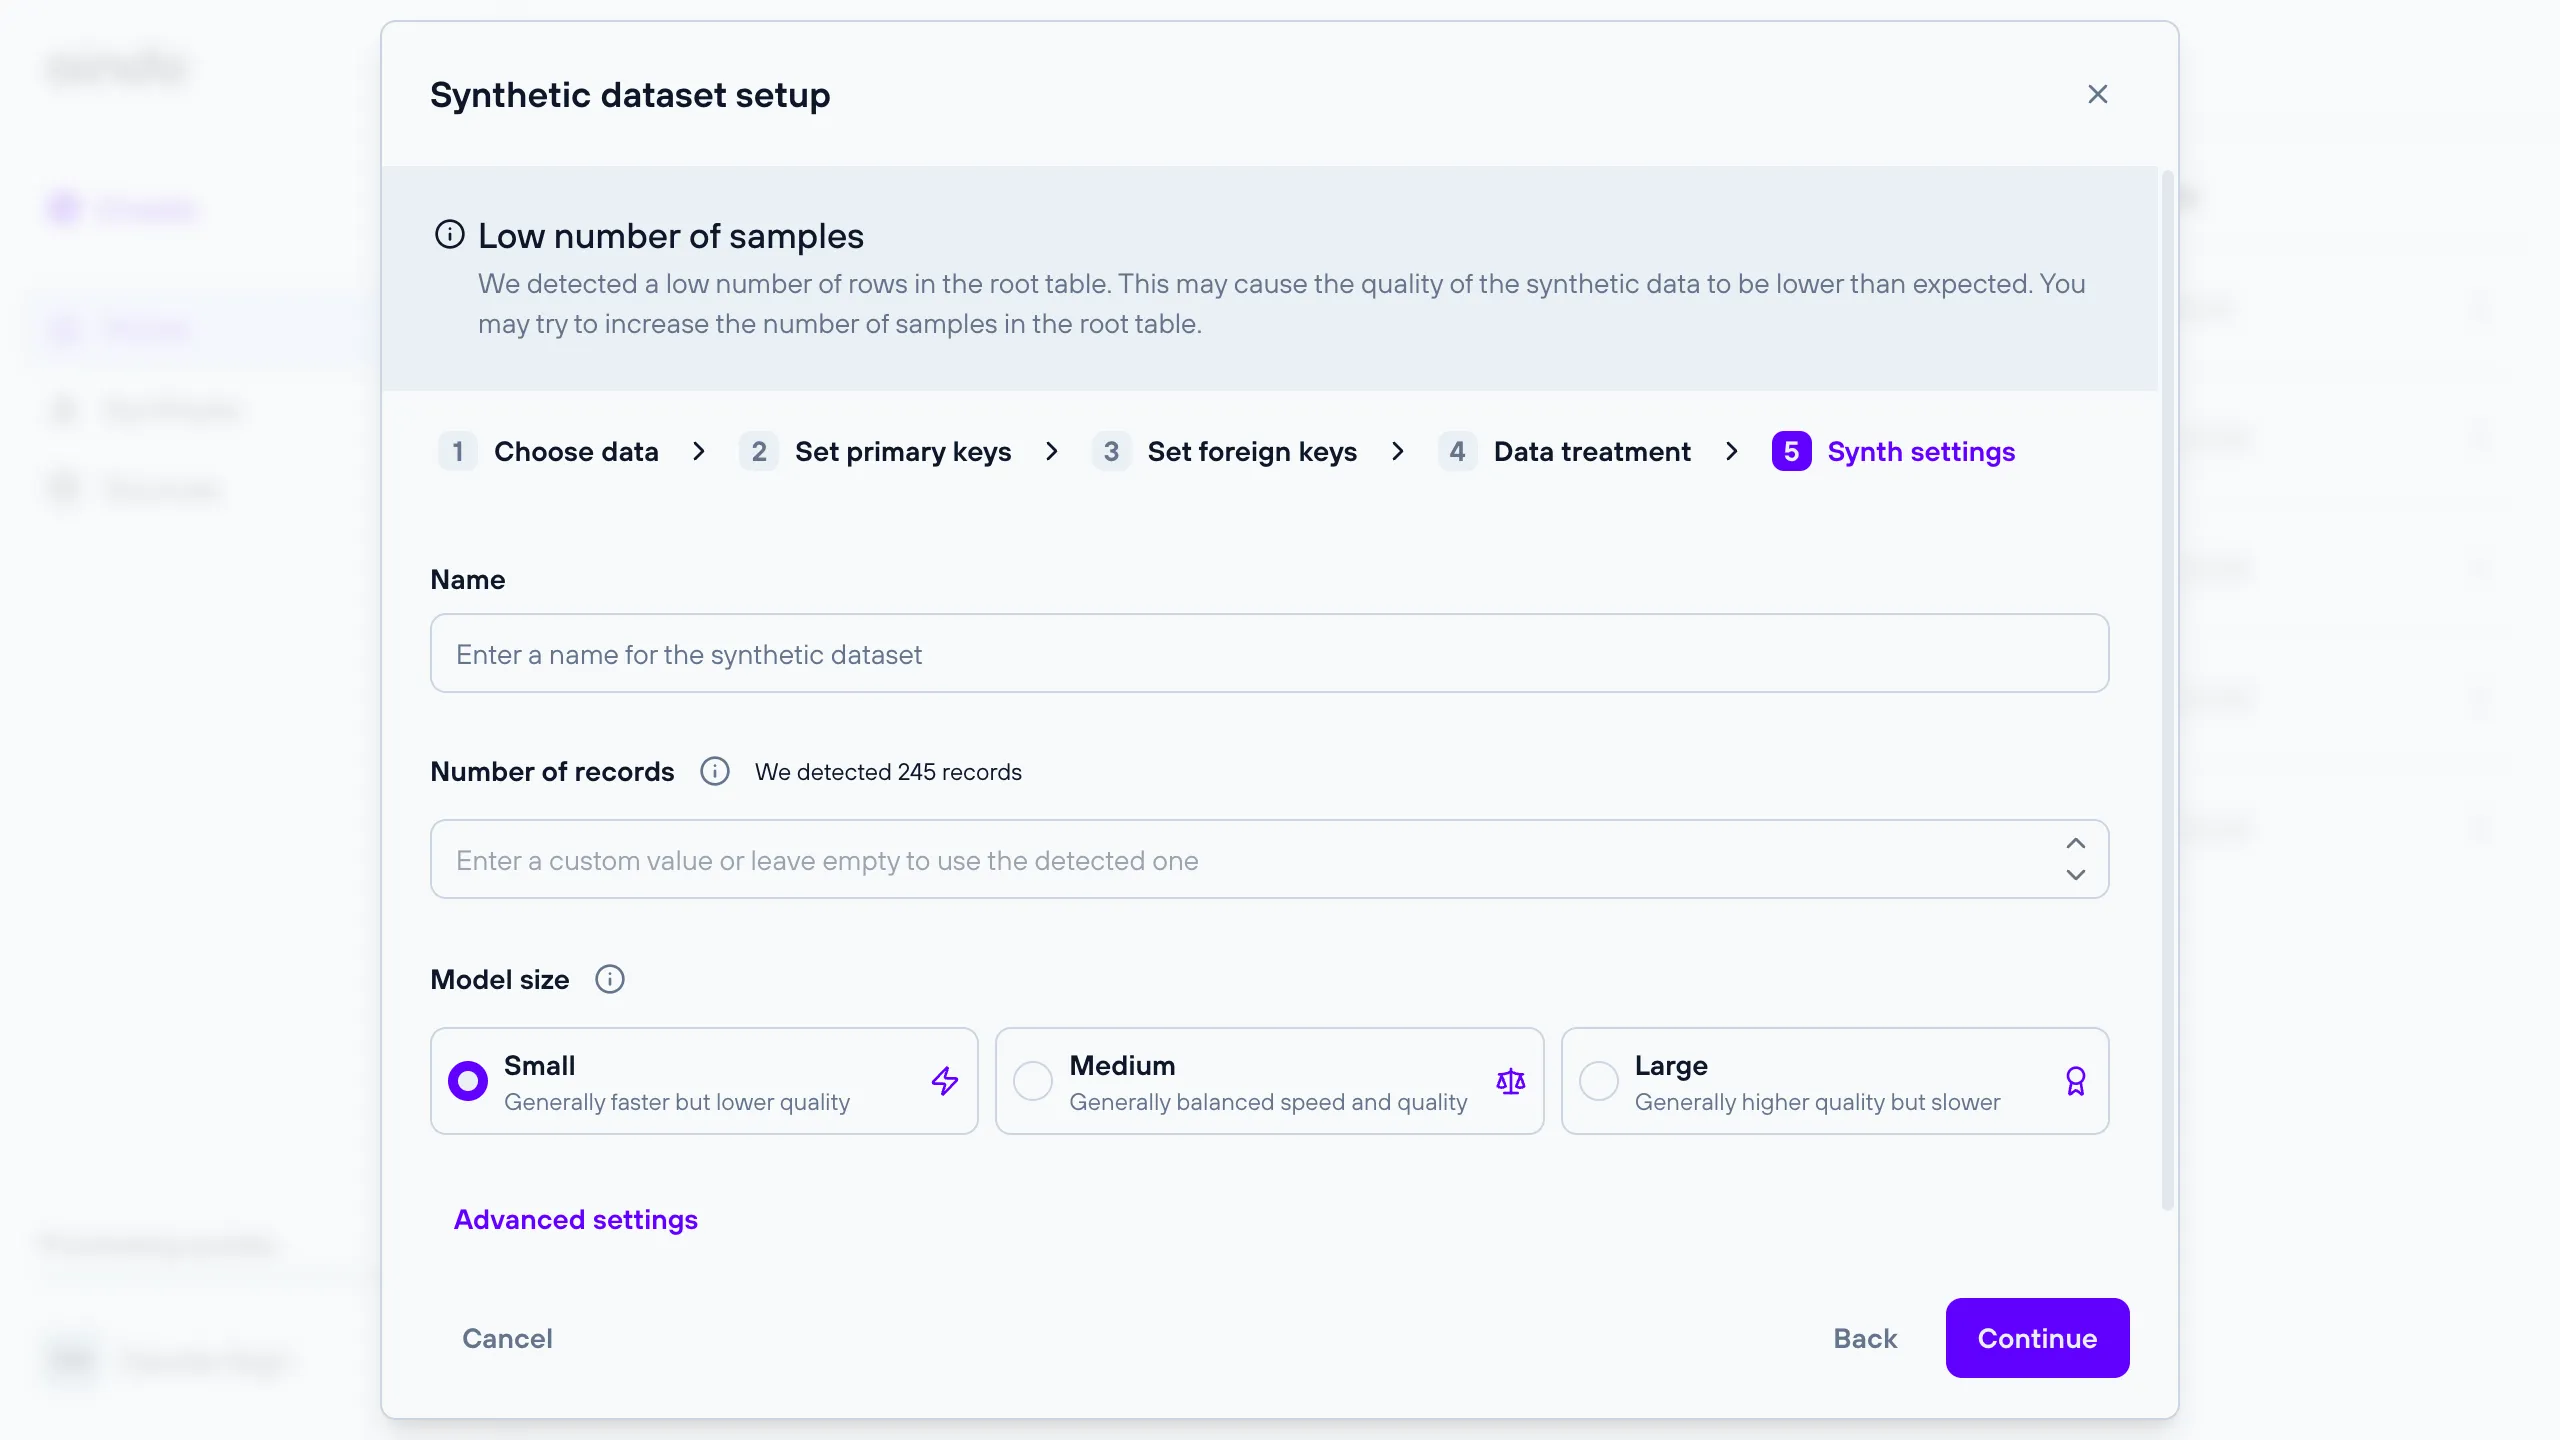
5. Synth settings
The ‘Synth Settings’ step allows you to configure various options regarding the generative model that will produce the synthetic data.
The basic options include:
- the
Nameof the synthetic dataset - the
Number of recordsof the root table that will be generated. If left blank, the detected number will be used - the
Model size
Advanced settings
If you need more control over the settings of the synthetic data generation process, you can open the Advanced settings menu. Here you will find options to customize the training models (both tabular and textual) and report generation parameters.
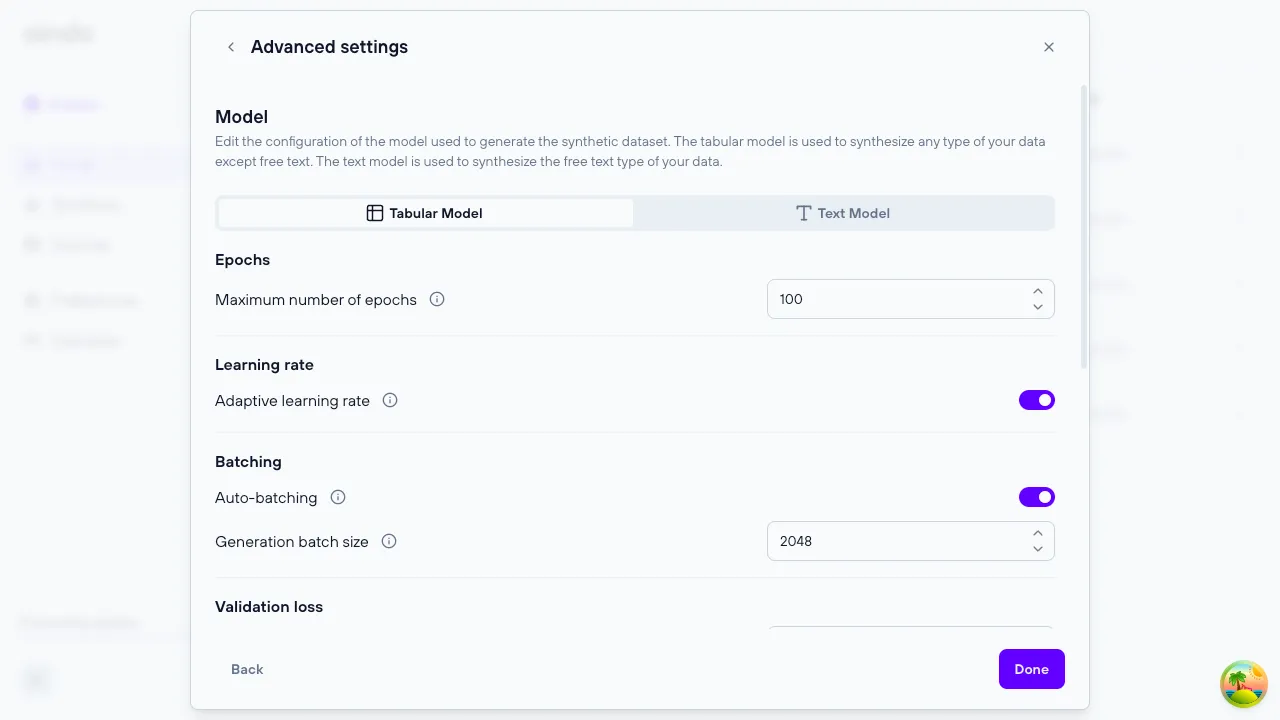
Tabular model parameters
Maximum number of epochs: Maximum number of times the model will see the training dataAdaptive learning rate: If enabled, the rate of optimization of model parameters will be estimated automatically and adaptively reduced during trainingLearning rate: Constant rate of optimization of model parameters. This parameter is available only whenAdaprive learning rateis disabled.Auto-batching: The batch size is the number of samples processed in parallel during training. If auto-batching is enabled, its value (as well as the maximum batch size in case you are using differentially private training) will be determined automatically based on the available memoryBatch size: Number of samples processed at each training step. If differential privacy is used, this value will be used to compute the sample rate for the Poisson sampling. The logical batch size varies during differentially private training, following a binomial distribution with rate B/N, where B is the batch size and N the number of samples. This parameter is available only whenAuto-batchingis disabledGradient accumulation: This parameter determines the number of batches processed before an optimization step. In practice, the logical batch size will be gradient accumulation * batch size. Use this parameter if the memory available does not allow you to use a batch size large enough for your use case. Available only without differential privacy (in this case parameter maximum batch size applies). This parameter is available only whenAuto-batchingis disabledGeneration batch size: Number or records that are synthesized in parallelValidation fraction: Number of samples used to estimate the validation loss. It is used to stop the training once the loss does not improve anymoreTraining steps: Number of steps between each calculation of the validation lossEarly stop delta: Minimum relative variation expected between each subsequent validation loss. If the delta is lower than this value, the training is stopped. Input 0 for full convergence (longer training), 0.001 for a balanced early stop, 0.01 for aggressive early stopping (quicker training)Differential privacy: Enables the usage of differential privacy. This option is available only when the current configuration has a single non-original table.Privacy budget epsilon: Privacy budget according to the definition of differential privacy. Generally epsilon ≤ 1 is considered a strong guarantee, 1 < epsilon ≤ 10 medium guarantee, epsilon > 10 weak guaranteePrivacy budget delta: Delta parameter according to the definition of approximate differential privacy. For strong guarantees, delta ≪ 1/N where N is the number of samples. In practice, higher values can be used depending on your needsNoise multiplier: Amplitude of the gaussian noise injected during training (in units of maximum gradient norm). Smaller values will reduce the noise added but will also decrease the number of steps before exhausting the privacy budgetMaximum gradient norm: This parameter is used to limit the size of the physical batch processed in memory. If you are defining this value you are also required to input the (logical) batch sizeMaximum (physical) batch size: This parameter is used to limit the size of the physical batch processed in memory. If you are defining this value you are also required to input the (logical) batch size. This parameter is available only whenAuto-batchingis disabled
Text model parameters
The settings of the text model is customizable only when there is at least a column with textual data.
Maximum number of epochs: Maximum number of times the model will see the training dataAdaptive learning rate: If enabled, the rate of optimization of model parameters will be estimated automatically and adaptively reduced during trainingLearning rate: Constant rate of optimization of model parametersAuto-batching: The batch size is the number of samples processed in parallel during training. If auto-batching is enabled, its value will be determined automatically based on the available memoryBatch size: Number of samples processed at each training step. If differential privacy is used, this value will be used to compute the sample rate for the Poisson sampling. The logical batch size varies during differentially private training, following a binomial distribution with rate B/N, where B is the batch size and N the number of samplesGradient accumulation: This parameter determines the number of batches processed before an optimization step. In practice, the logical batch size will be gradient accumulation * batch size. Use this parameter if the memory available does not allow you to use a batch size large enough for your use caseGeneration batch size: Number or records that are synthesized in parallelValidation fraction: Number of samples used to estimate the validation loss. It is used to stop the training once the loss does not improve anymoreTraining steps: Number of steps between each calculation of the validation lossEarly stop delta: Minimum relative variation expected between each subsequent validation loss. If the delta is lower than this value, the training is stopped. Input 0 for full convergence (longer training), 0.001 for a balanced early stop, 0.01 for aggressive early stopping (quicker training)
Pdf report generation
In this section you can adjust parameters related to PDF report generation, such as setting limits on the number of columns displayed in the output file.
Univariate distributions: Limit the number of columns that will be included in the ‘Univariate distributions’ sectionBivariate distributions: Limit the number of columns that will be included in the ‘Bivariate distributions’ sectionk-NN analysis: Limit the number of columns that will be included in the ‘k-NN analysis’ sectionPhiK analysis: Limit the number of columns that will be included in the ‘PhiK analysis’ section
Configuration validations
Each configuration step may have constraints that need to be satisfied to create a fully functional synthesis. The configuration process guides you through meeting these constraints by displaying alerts when they are not satisfied.
Configuration complexity assessment
A complexity assessment evaluates the complexity of a synthesis configuration and dataset to determine its suitability for optimal performance. This assessment runs automatically in the final step of the synthesis creation process, once all validation requirements for the configuration are met. The assessment result will either be positive or negative. A positive result indicates that the synthesis process will likely yield optimal results. Conversely, a negative result suggests the synthesis process may take a long time or produce suboptimal outcomes. In the case of a negative result, a warning will be displayed with suggestions on how to adjust the configuration to enhance synthesis performance.
Choose a destination
After selecting the configuration, the user will be prompted with a dialog where they can choose a destination for writing the synthesized data.
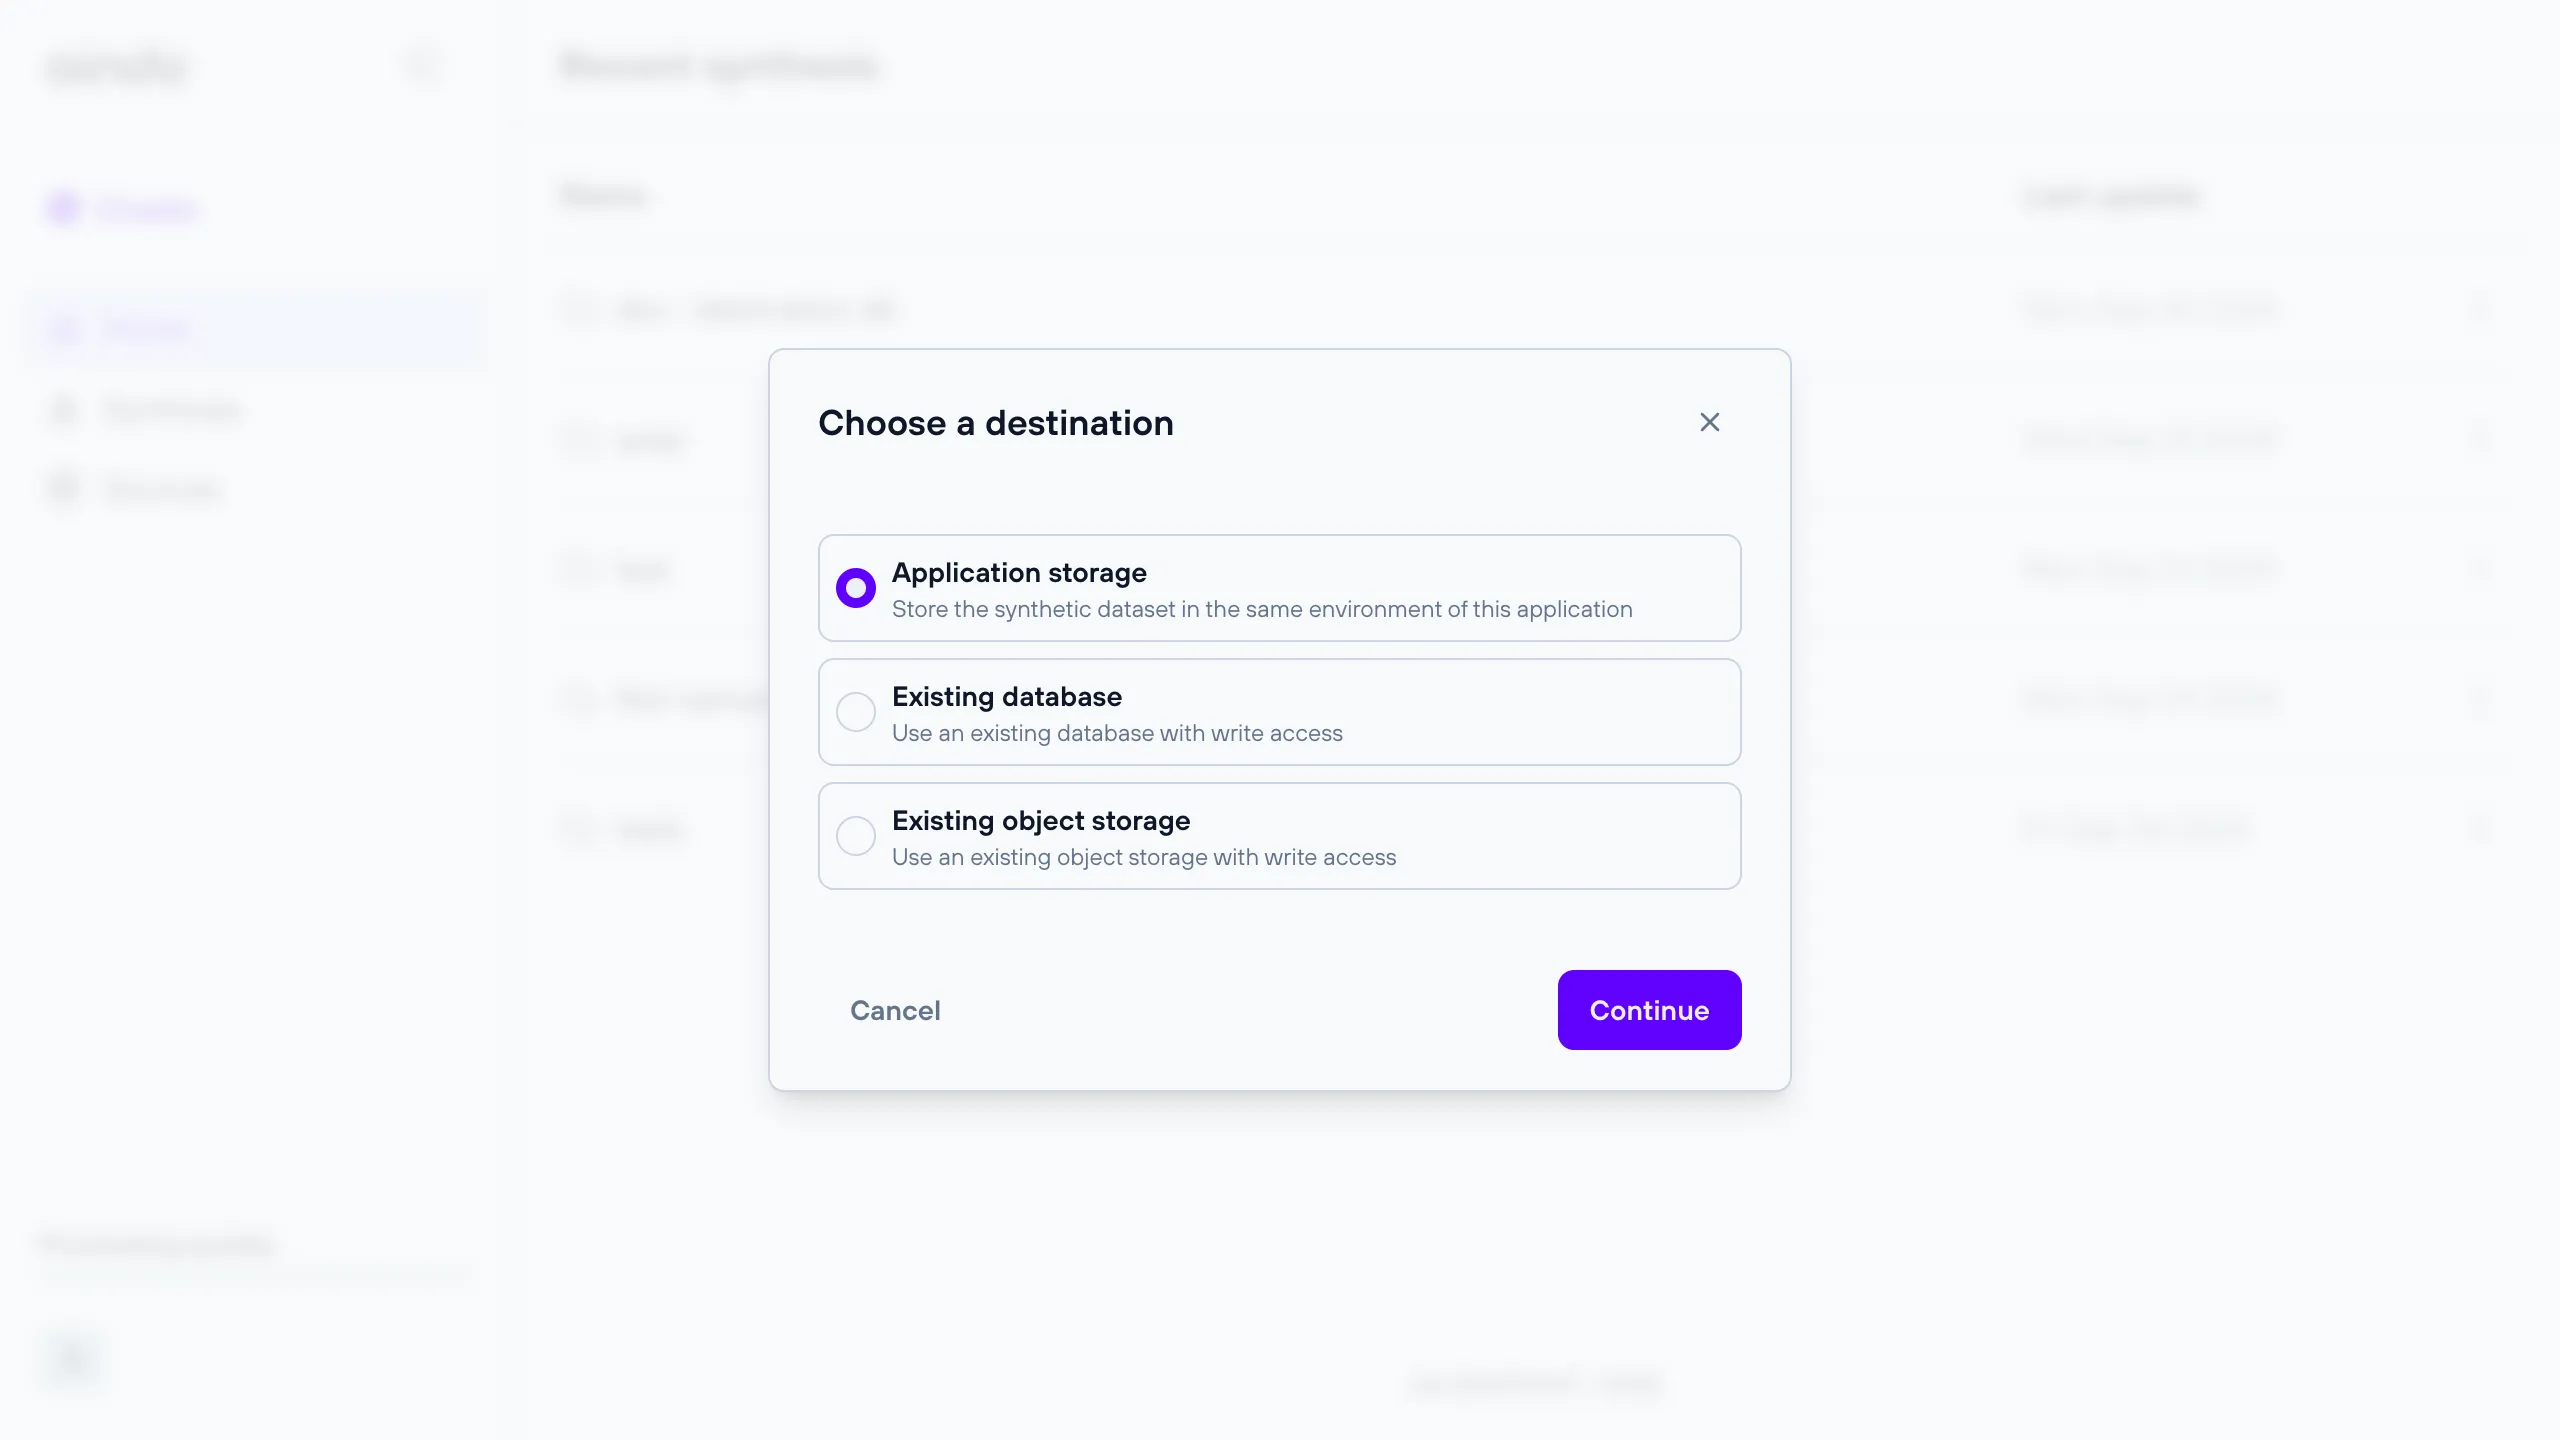
See the sections below for more details about each choice.
Aindo Cloud
The default option. A safe storage managed by Aindo, either on the cloud or locally for on-premise deployments.
If you would prefer more control over your data, see the options below.
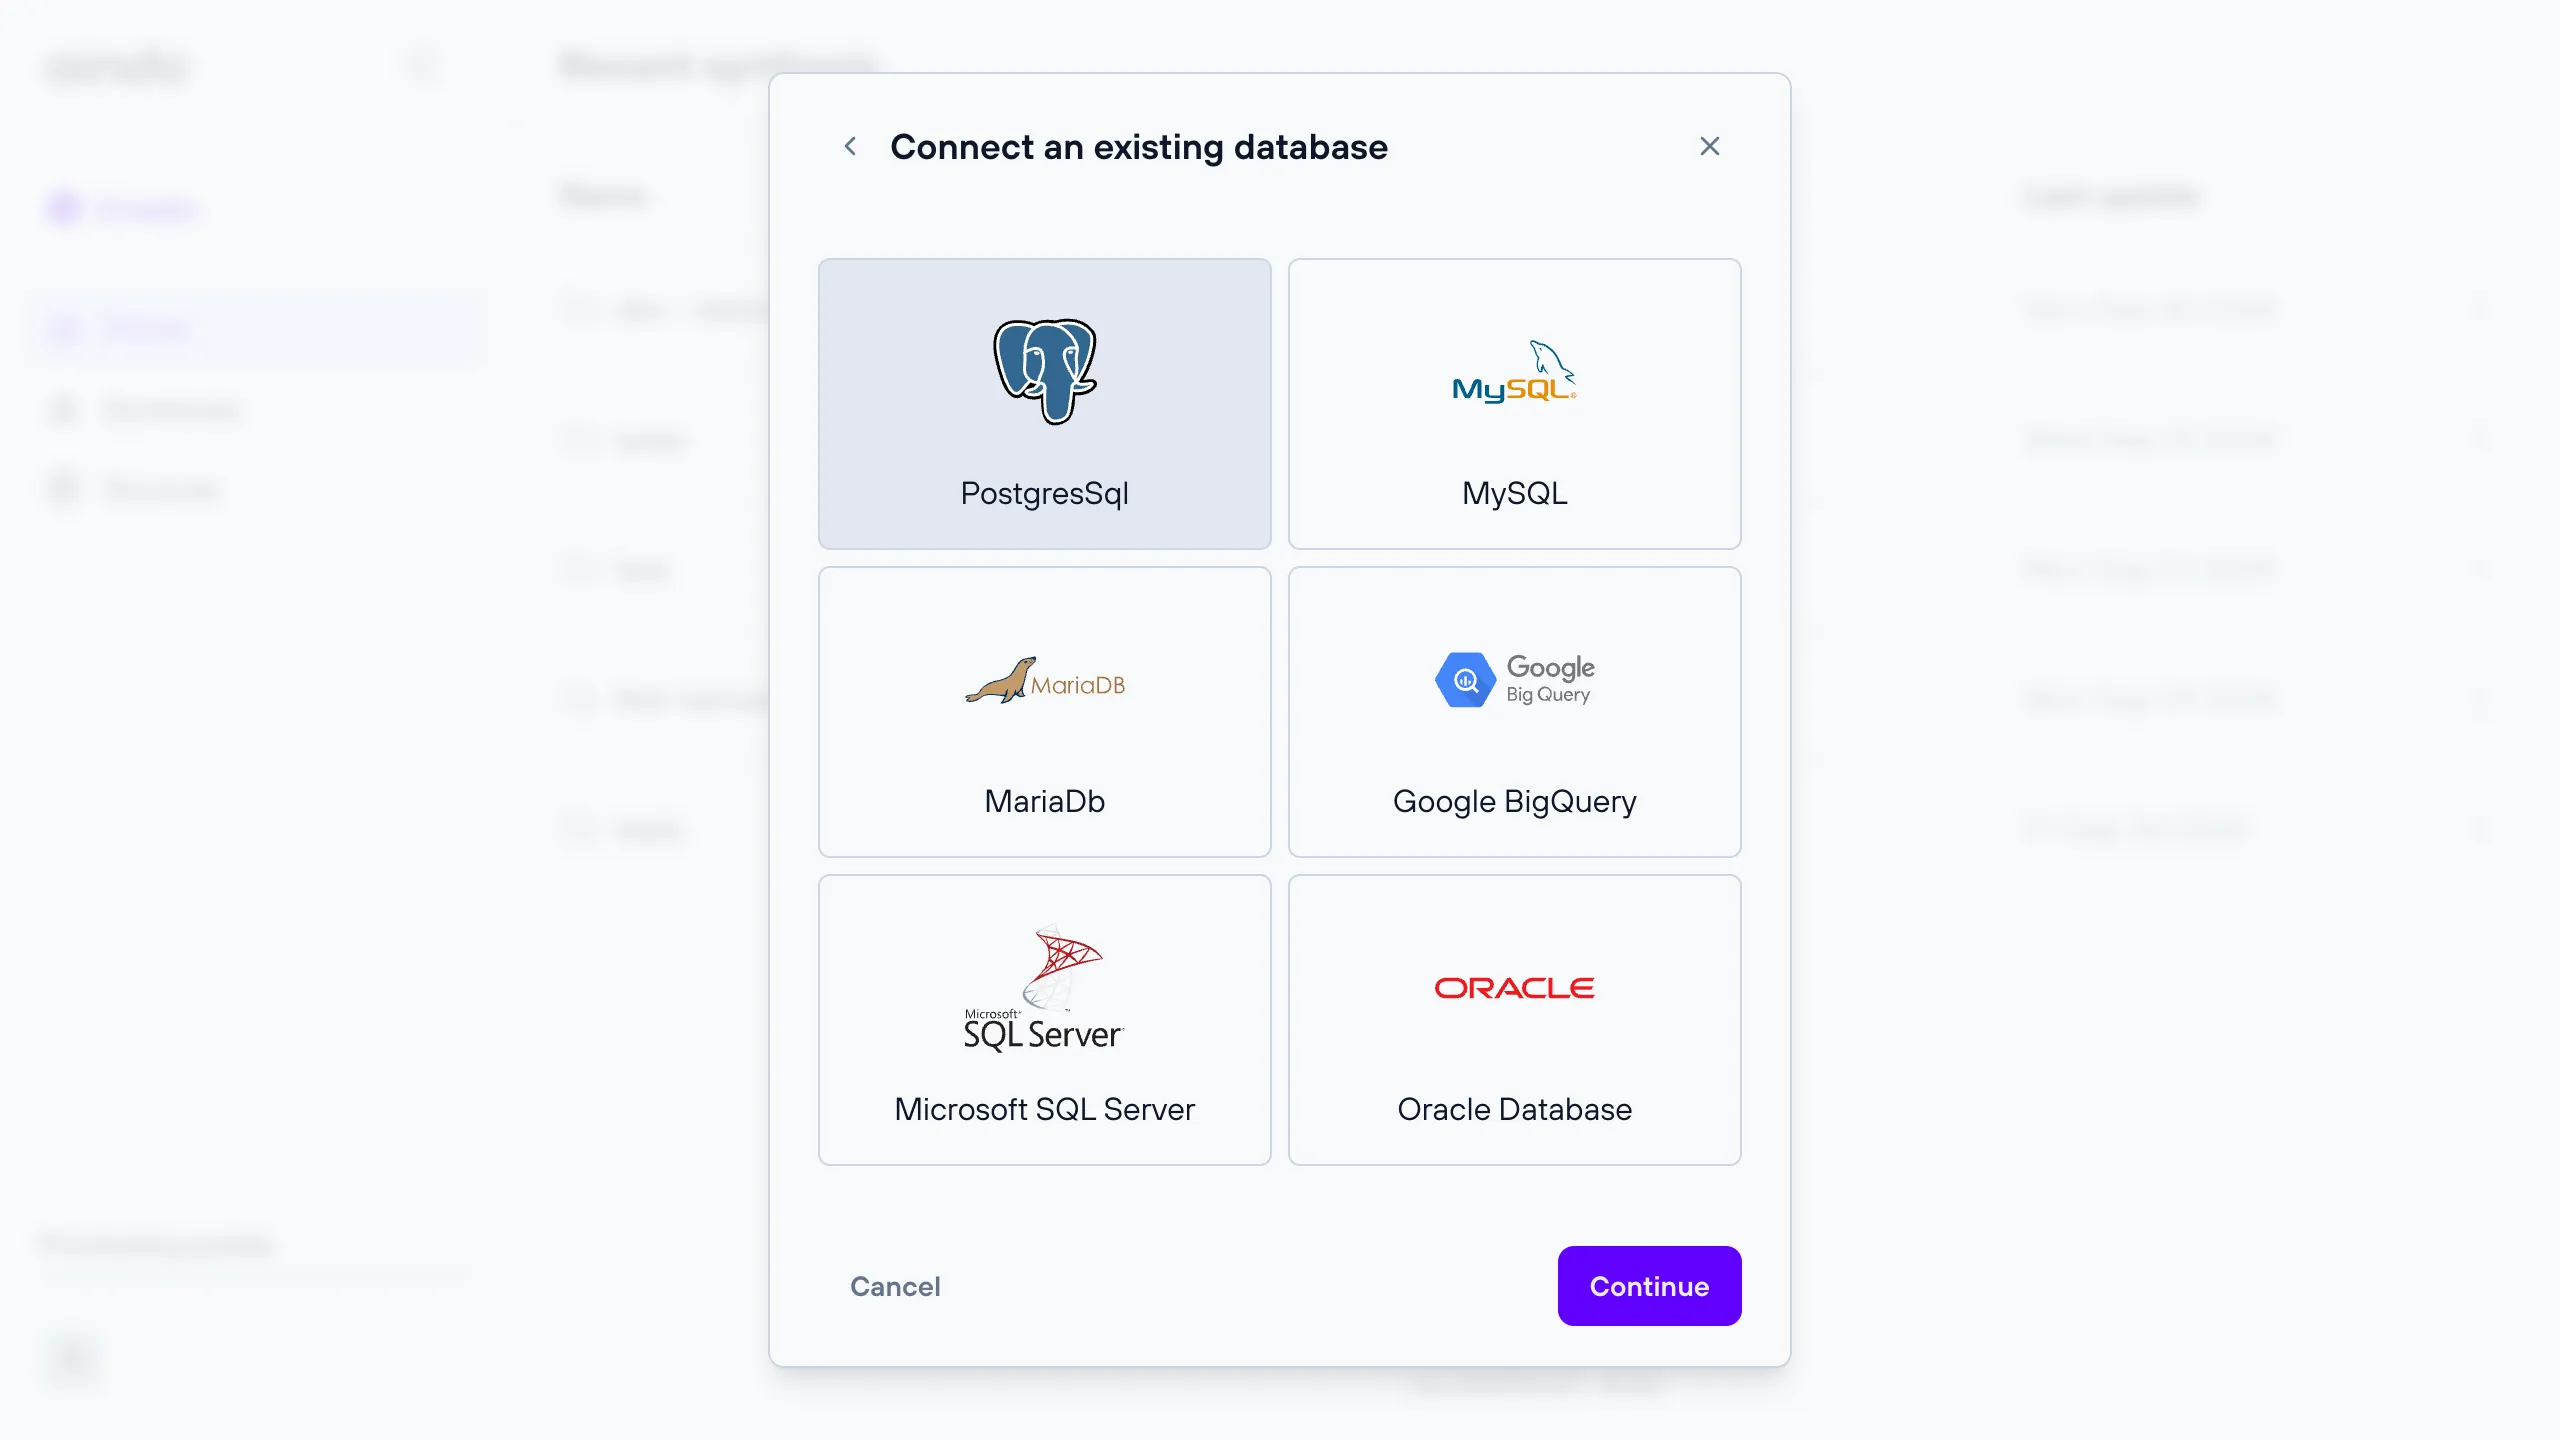
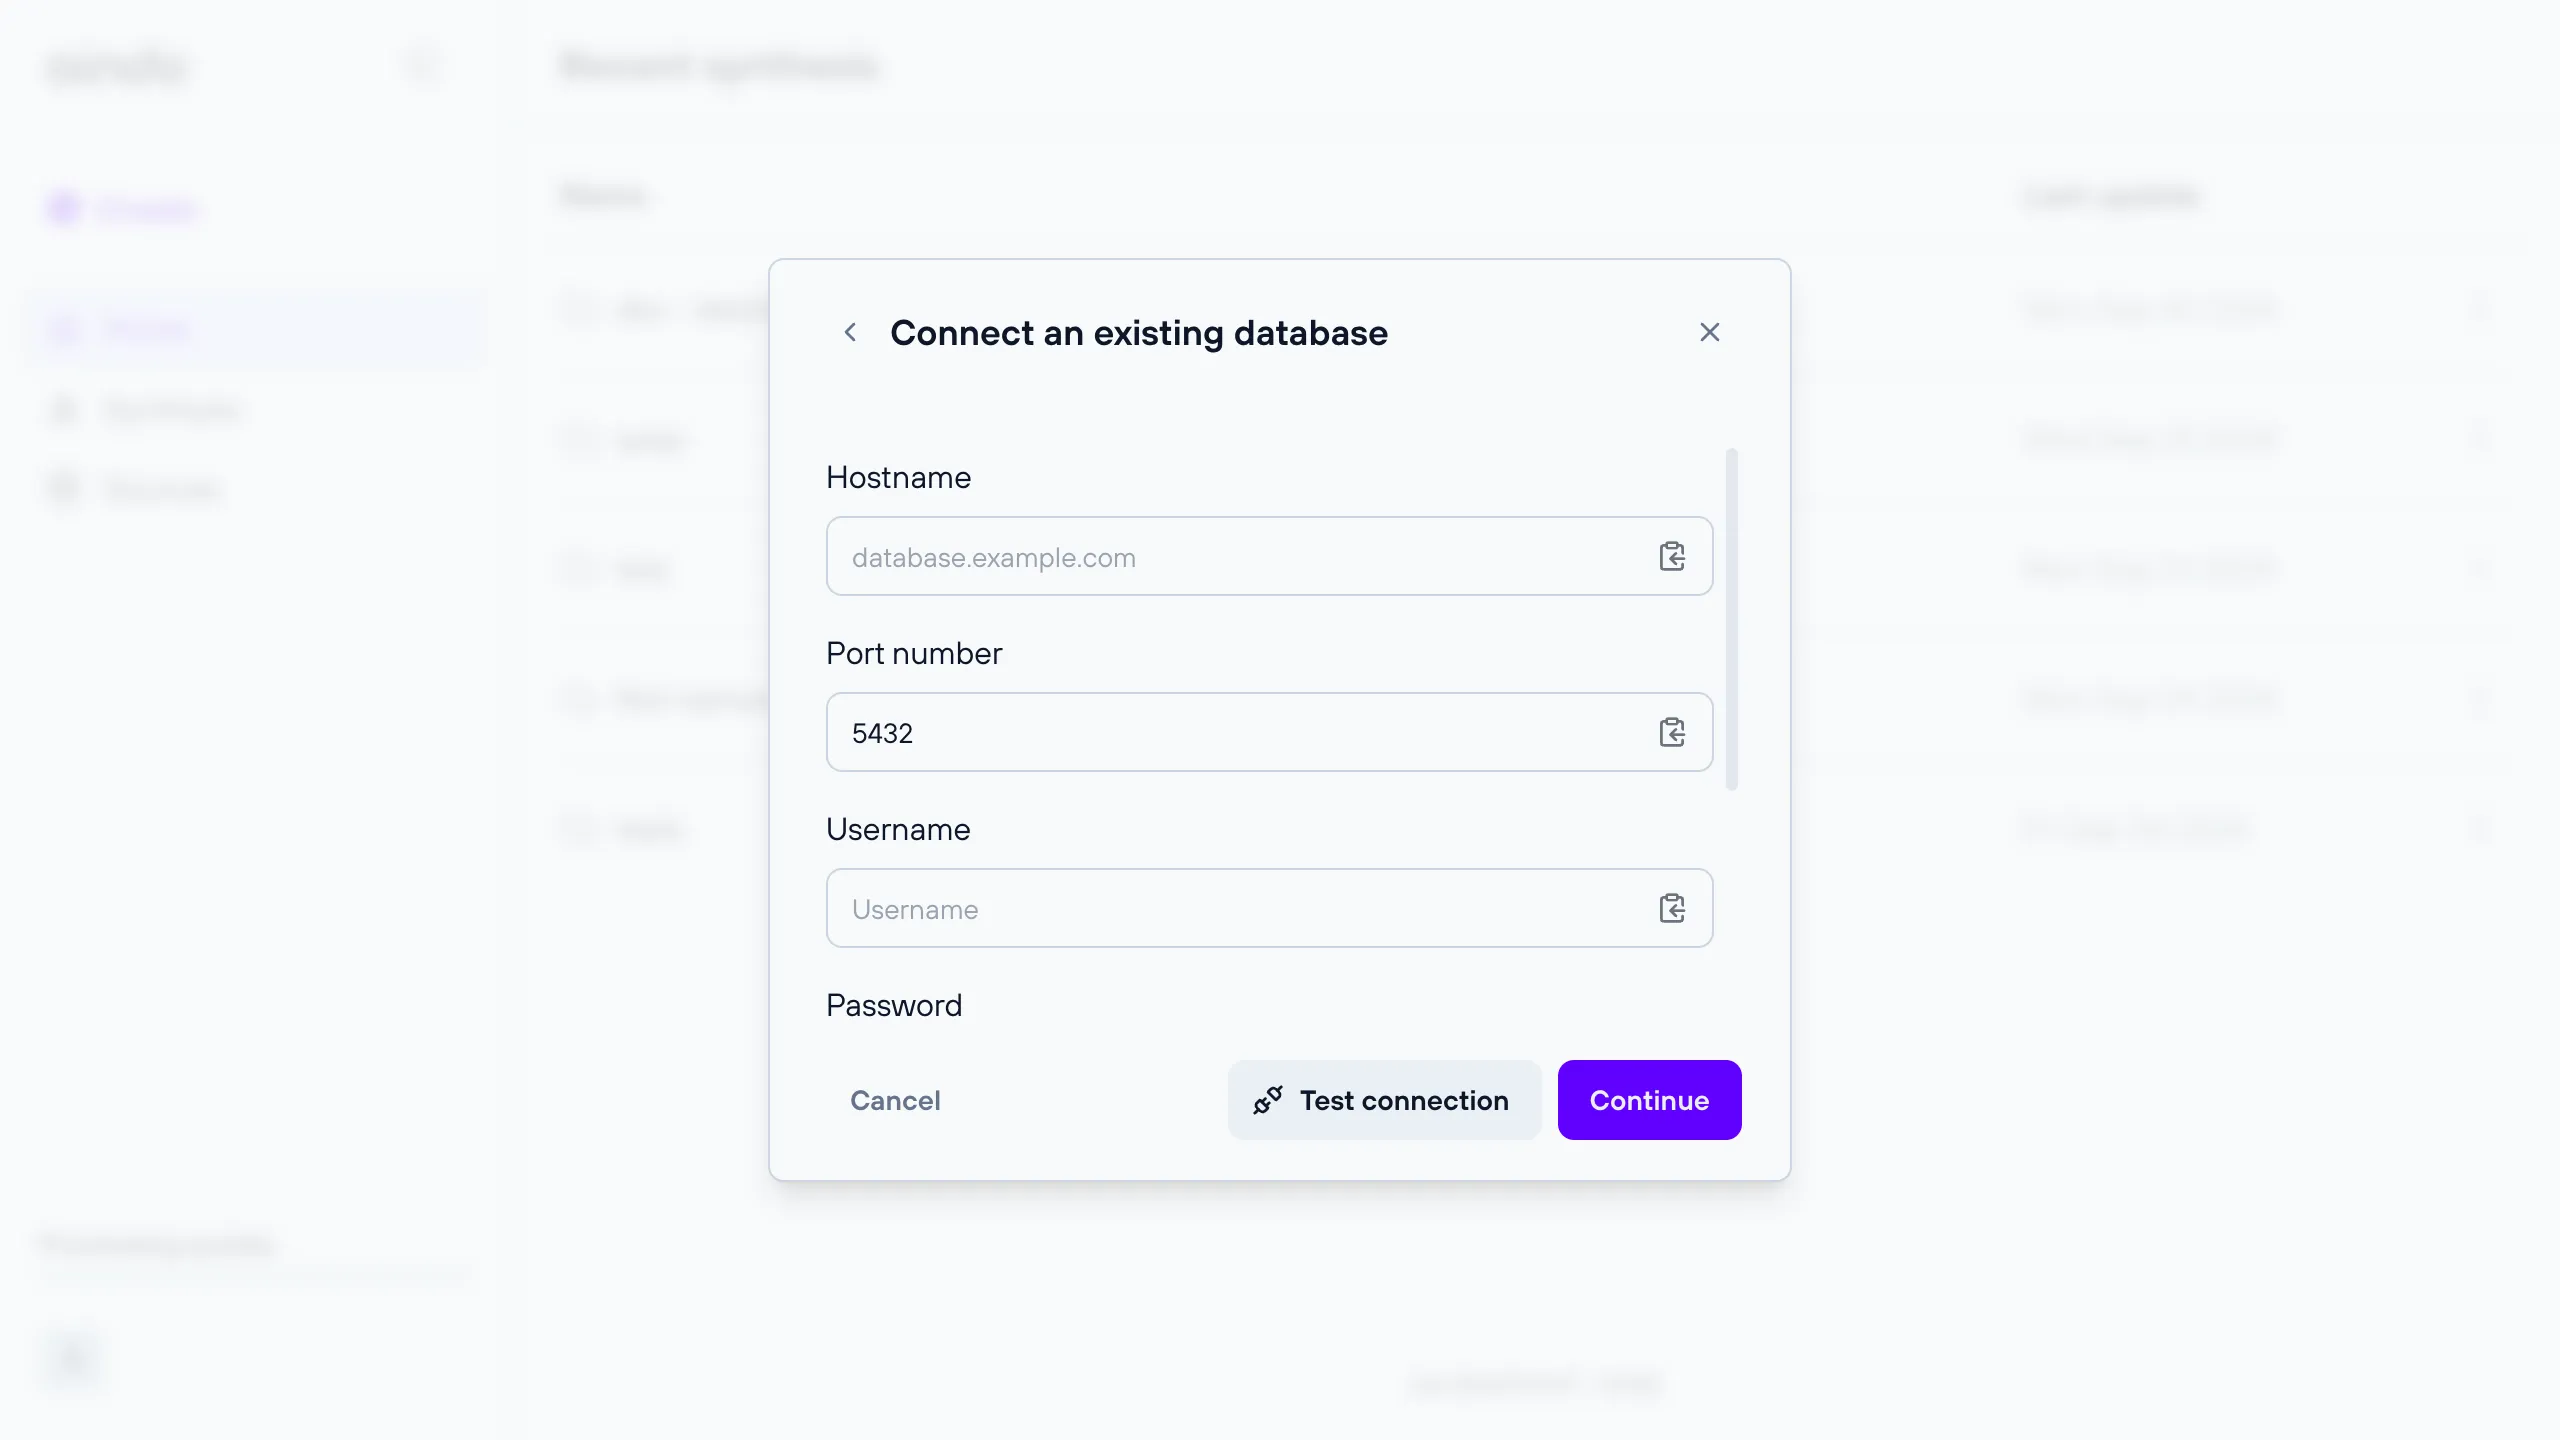
Remote database destination
A remote relational database for which you can provide connection details.
All databases that are available when configuring a data source are also available as destinations. This includes PostgreSQL, MySQL, MariaDB, Google BigQuery, Microsoft SQL Server, and Oracle Database.
Note: The provided connection details must allow write access, otherwise the synthetic dataset cannot be saved.
Remote object storage destination
A remote object storage for which you can provide connection details.
Note: The provided connection details must allow write access, otherwise the synthetic dataset cannot be saved.
All object storages that are available when configuring a data source are also available as destinations. This includes S3 and Google Cloud Storage.
When using an object storage as destination, object keys will correspond to the names of contained tables: these do not
include file extensions such as .csv unless they are also present in the table name.
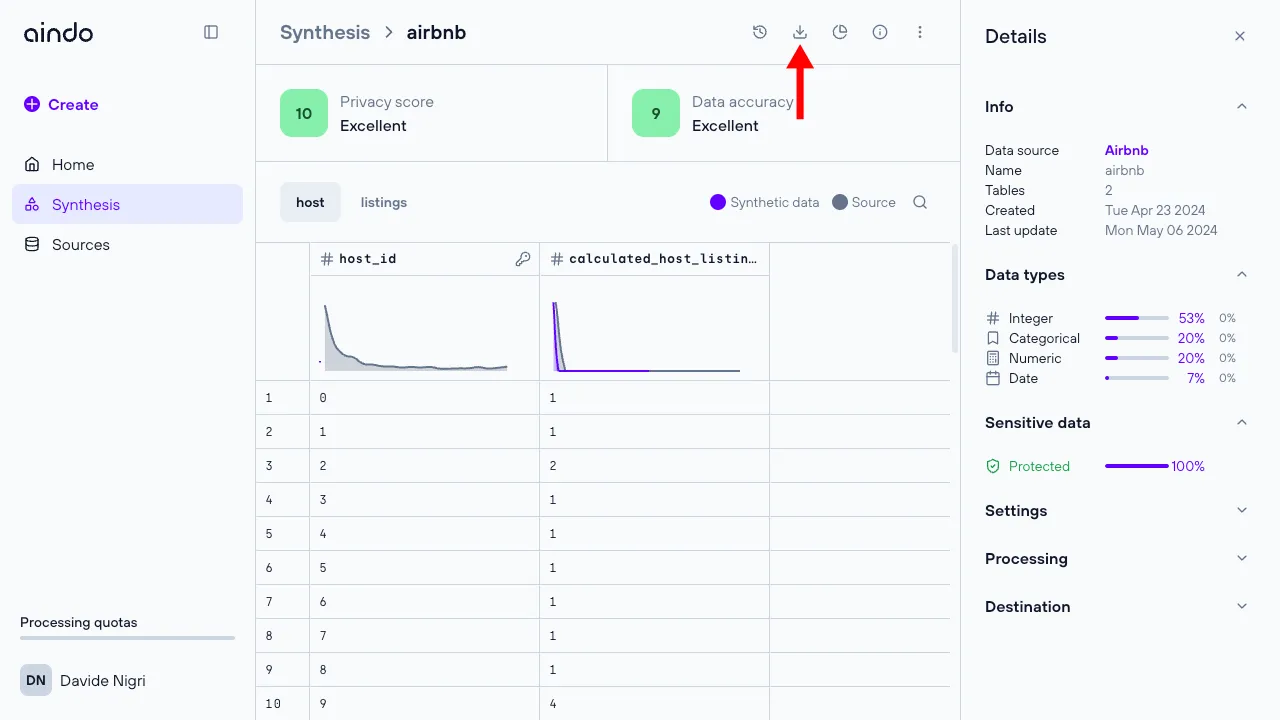
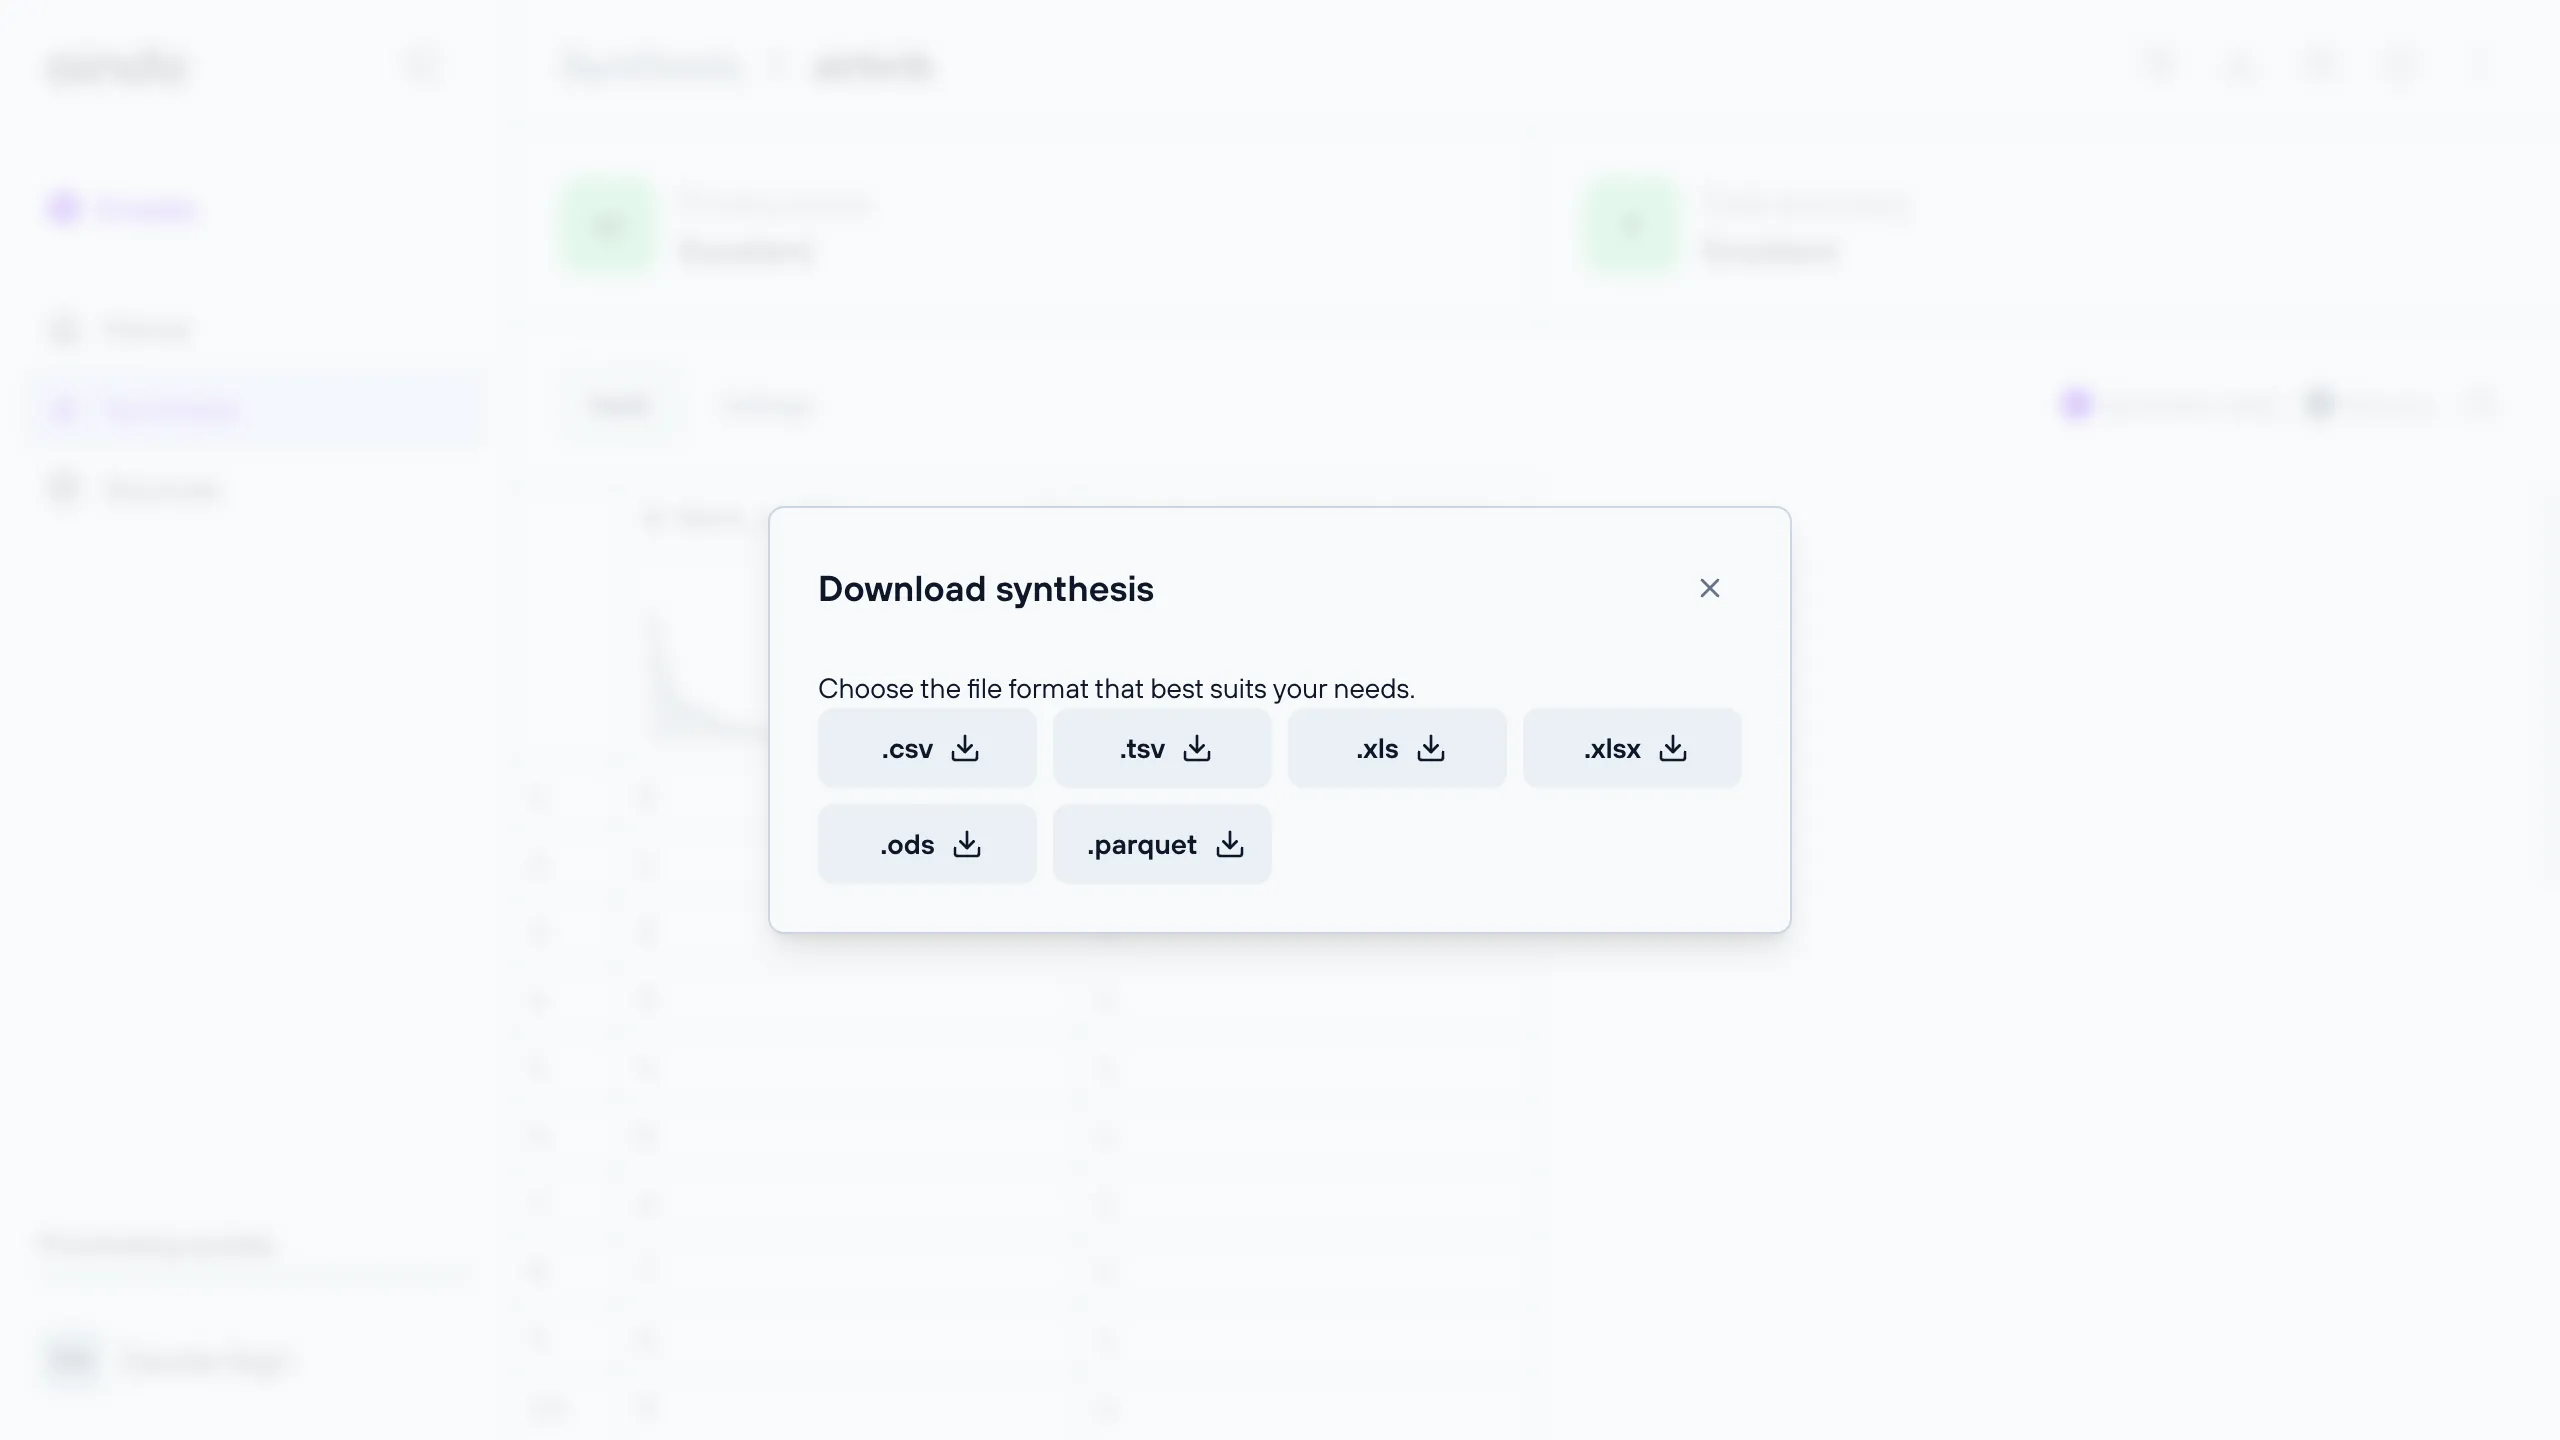
Download a synthetic dataset
Whether you choose to save the synthetic dataset on Aindo Cloud or on an existing database, you still have the option to download the entire dataset and save it locally on your computer. You can download any execution of a synthetic dataset from the preview page once its processing is finished.
The supported file extensions that you can choose between are: .csv, .tsv, .xlsx, .ods, .parquet.
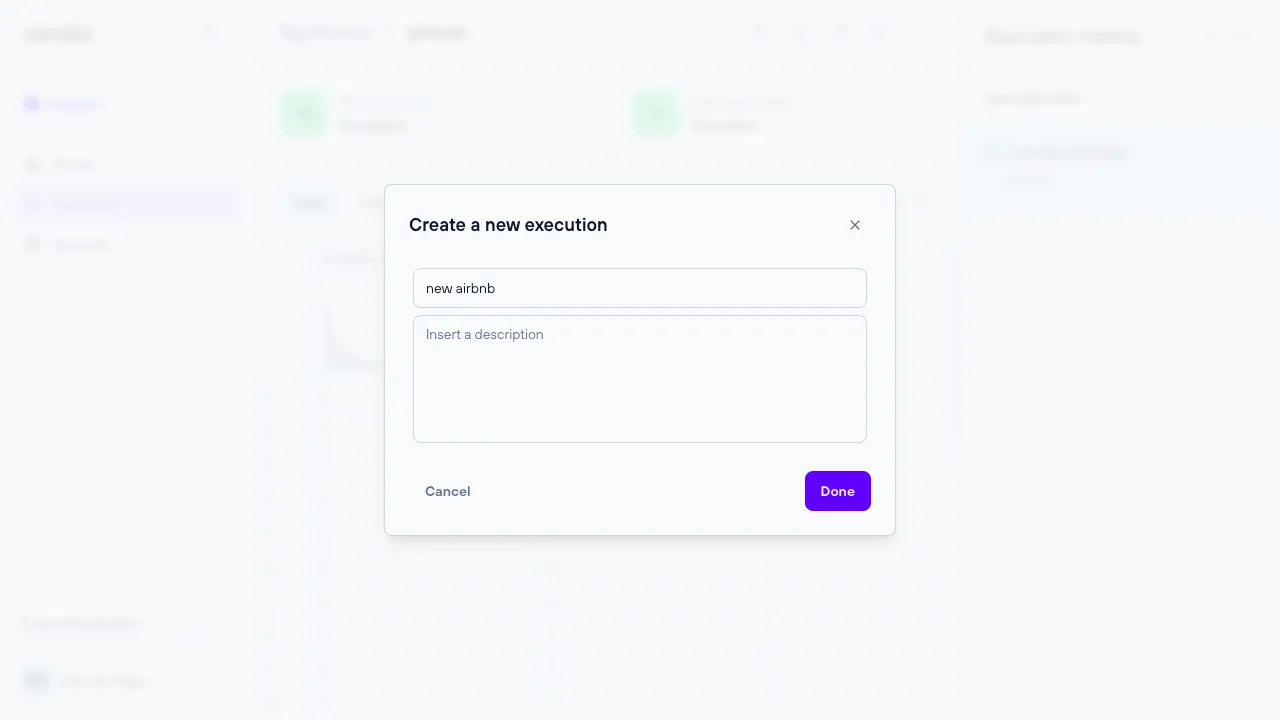
Execute the synthesis (timeline)
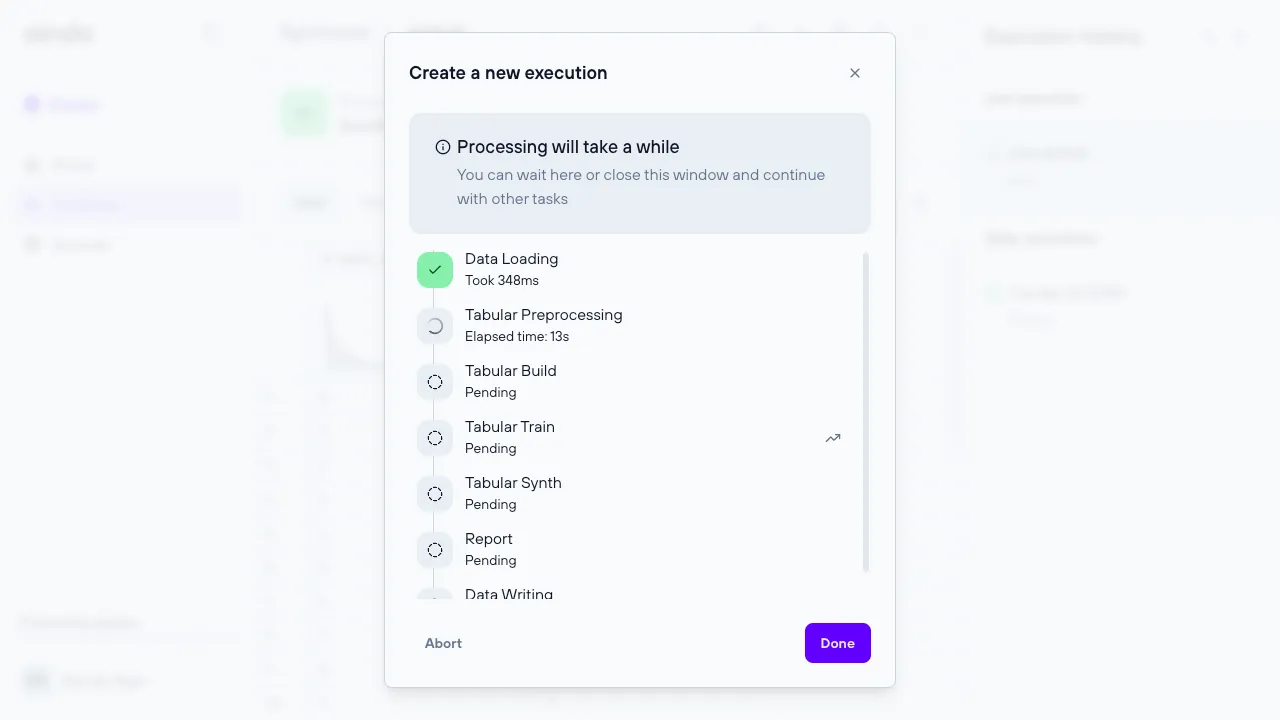
Once you have finished configuring the synthesis, clicking the final ‘create’ button will start the execution. Each execution consumes resources, defined in the platform as quotas. After the execution starts, you will be redirected to the view page, where the timeline dialog will automatically open to show the various steps of the synthesis process.
The steps involved in generating a synthesis are:
- Data loading
- Preprocessing
- Building the Generative AI model
- Training the Generative AI model
- Synthesis (Output of the Generative AI model)
- Report generation
- Store the newly synthesized data

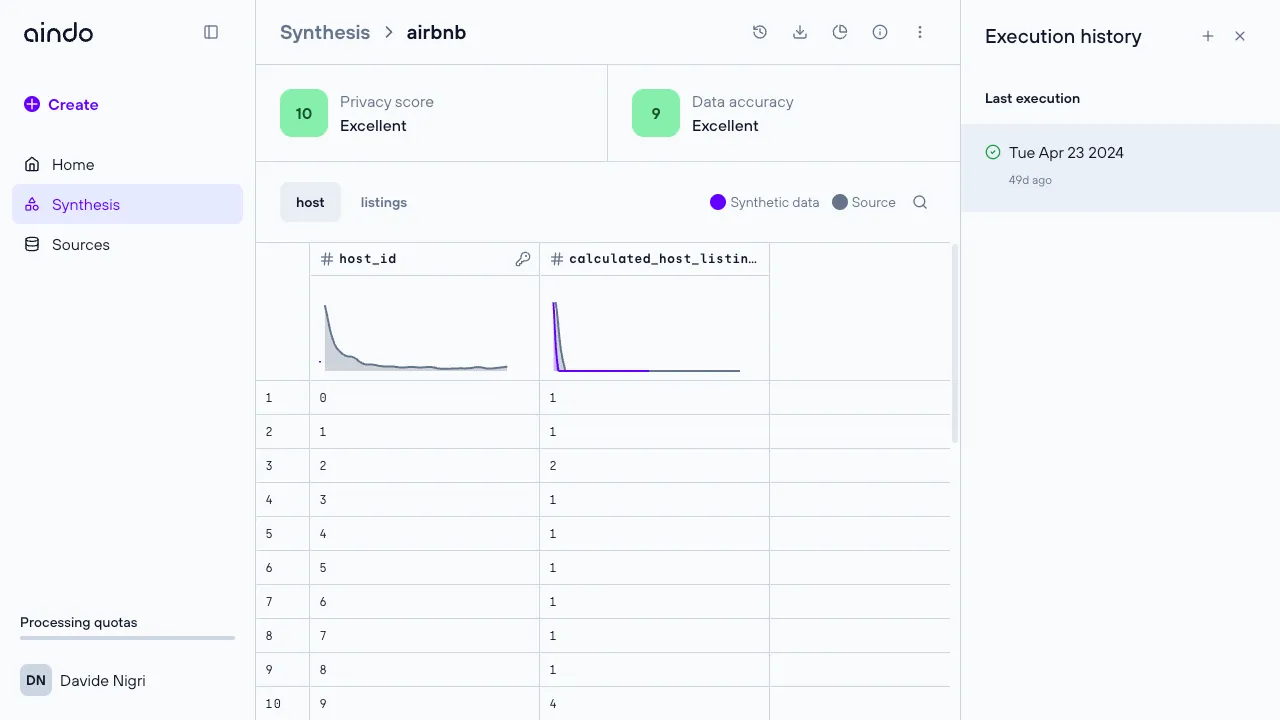
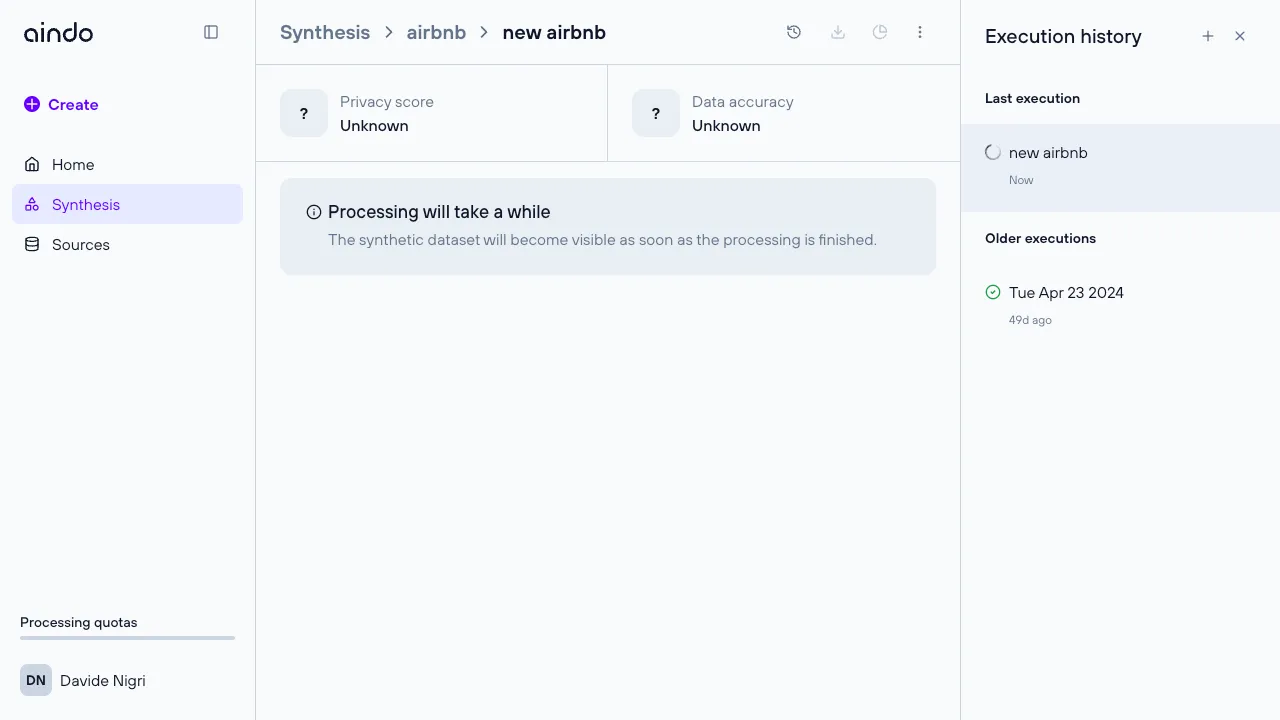
Multiple executions
You can execute the same synthesis multiple times, which is useful if the source data changes over time or if you need to generate additional data. This is possible through the execution history side panel, where you can create, rename, and delete executions of a specific synthesis.
Troubleshooting
If you encounter any issues, here are some common problems and their solutions:
- Create button returns configuration error: If there are no validation errors during configuration but the synthesis creation still fails, there may be other unsatisfied constraints. Carefully read the error message for hints about the failed configuration, or contact support for assistance.
- Preview of data in configurator fails: The source data used to configure the synthesis may no longer be available or may have changed connection settings.
- dataset too little: If a dataset has too few data points, synthesis is not possible.
- finished quota: See quota errors
FAQ
Q: What should I do if the “Create” button returns a configuration error?
A: If there are no visible validation errors but the synthesis creation still fails, check the error message for hints about the failed configuration. Ensure all constraints are satisfied. If the problem persists, contact Aindo support for assistance.
Q: Why does the preview of data in the configurator fail?
A: This issue may occur if the source data is no longer available or if its connection settings have changed. Verify that the source data is accessible and that connection settings are correct.
Q: What can I do if my dataset is too small to generate a synthesis?
A: If the dataset has too few data points, synthesis may not be possible. Consider gathering more data to increase the dataset size.
Q: What are quotas and how do they affect synthesis runs?
A: Quotas are resource limits defined on the platform. Each synthesis run consumes resources, which count against your quotas. If you run out of quota, you won’t be able to start new synthesis runs. Check your quota status and manage your usage accordingly.
Q: How do I know which columns are marked as sensitive?
A: Columns marked with a gray ‘shield’ icon in the ‘Data treatment’ step indicate that they contain sensitive data. These columns should be synthesized to protect the sensitive information.